Contacts
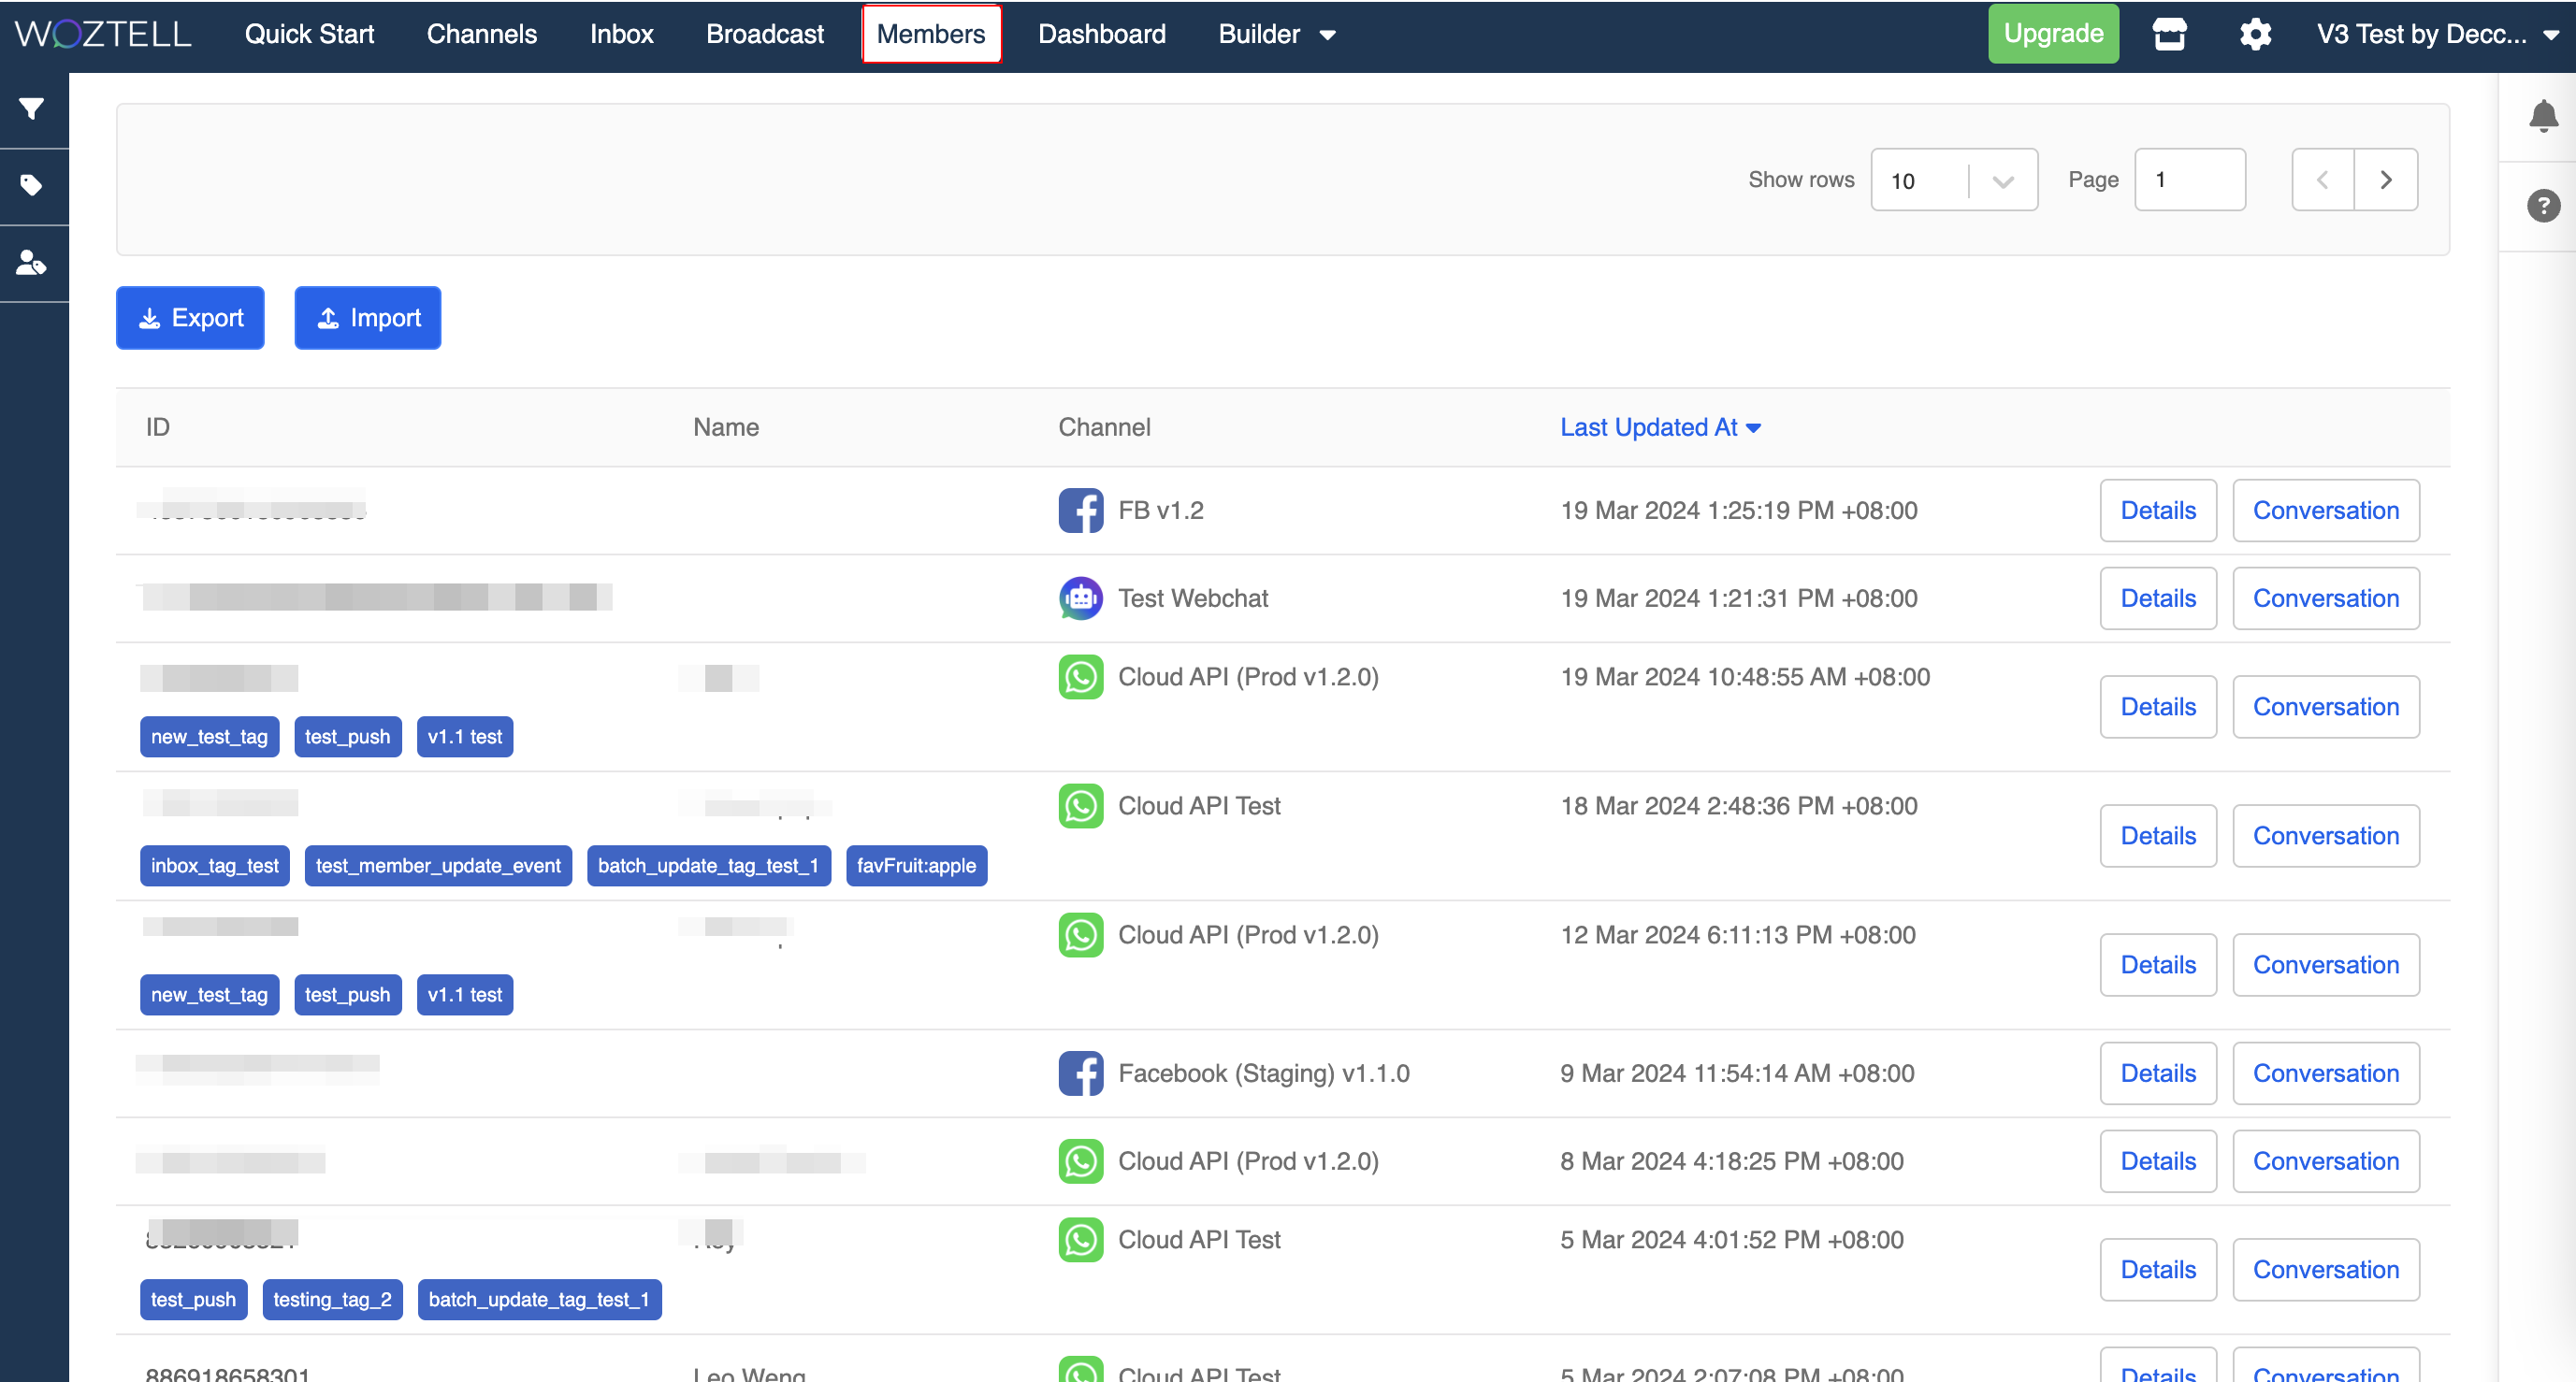
Members is the section where you can find the profile of all your subscribers of your chatbots. Anybody who have talked to your chatbot will be displayed here in list view. You can take a look at their tags and detailed conversation history.
Open Members PageBasic Information

You will be able to find the following information within a member: External ID, Name, Tags, Member Details and Conversation History.
| Property | Description |
|---|---|
| External ID | Applicable to all platforms; a unique string of ID to identify the identity of each member in different platform |
| Name | Only applicable to platforms that provide the name of users |
| Tags | Applicable to all platforms; custom tagging added in Node Inspector ; each tag will be displayed as a blue label |
| View | Click to view more member details |
| View Conversation | Click to view all the conversation history of the specific member |
View Member Details
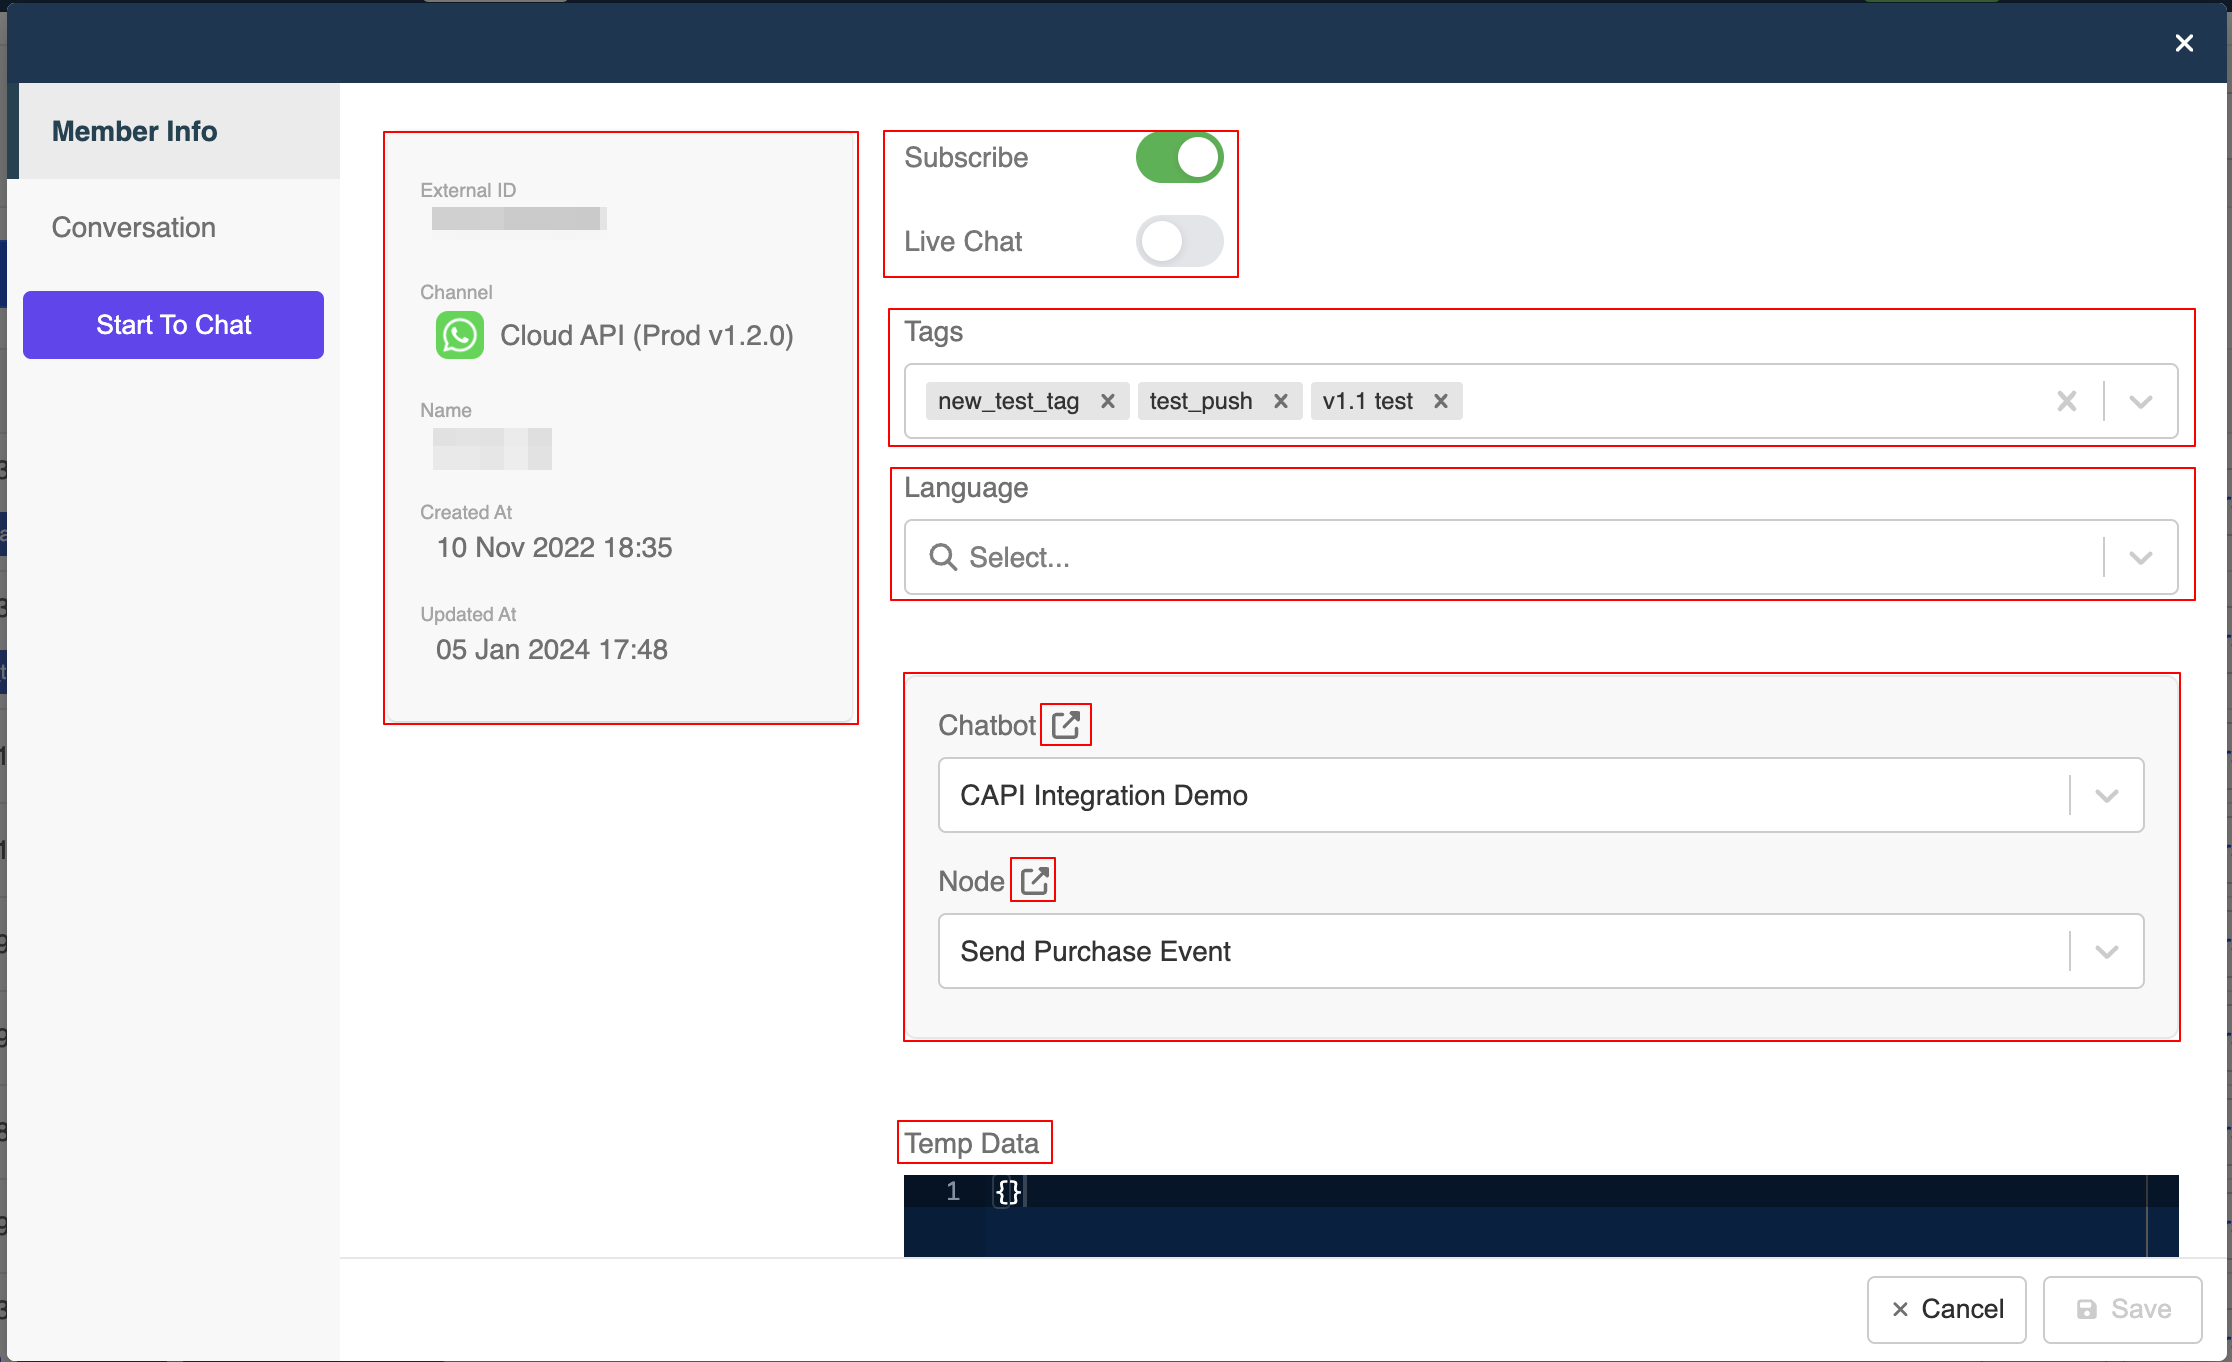
If you click the "View" button, you will be able to read more in-depth about a subscriber. Here're a list of items you will be able to find in the modal:
| No. | Property | Description |
|---|---|---|
| 1 | Basic Information | Member's basic information including External ID, Name, Gender, Creation Date/Time and Last Activity Date/Time |
| 2 | Subscribe/Live Chat | The button will be toggled on automatically once the users subscribe to your chatbot or enter into live chat mode; you may also switch the buttons on/off manually |
| 3 | Tags | All member tags belong to this member; you can manually add/delete specific tags created for this channel |
| 4 | Locale | Indicate the language setting of this member; you can manually assign another language to the member |
| 5 | Chatbot & Node | The position of the user currently is at, and the button can redirect you to the corresponding chatbot or node. |
| 6 | Temp Data | Any other useful data stored in the member's profile, such as the choices made by the users; you can customize it in actions |
View Conversation History
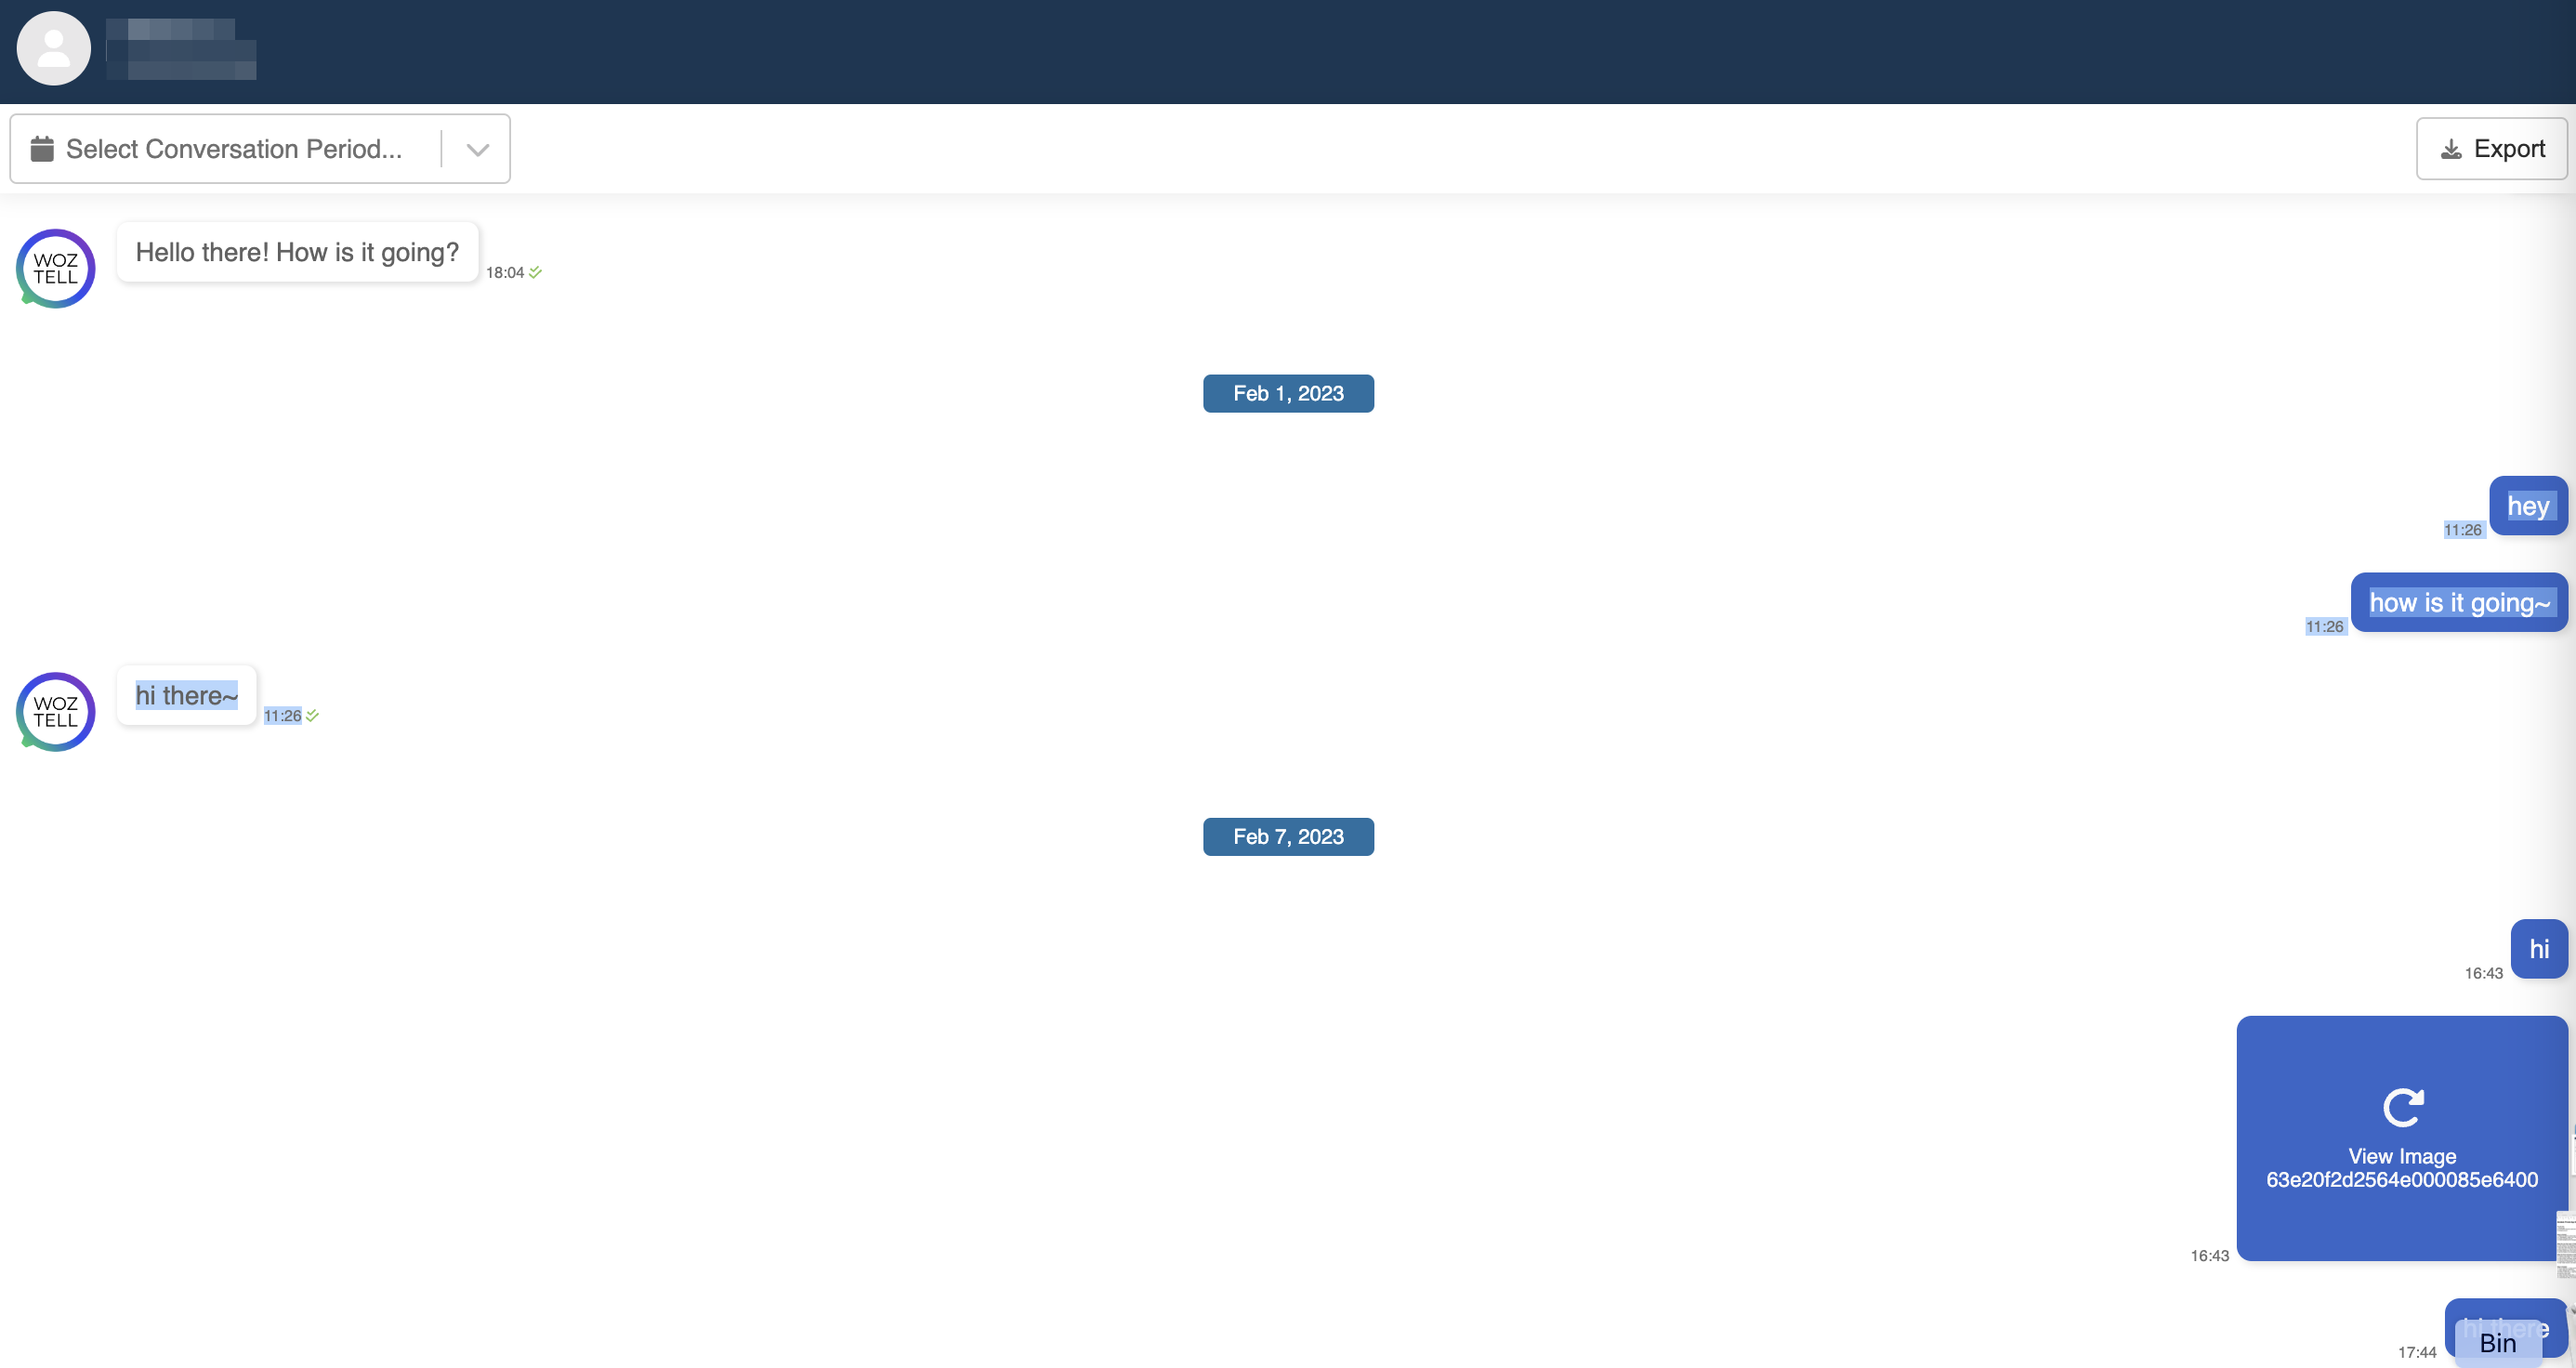
If you click the "View Conversation" button, the website which shows the full conversation history of this user will be opened in a new tab. The grey messages on the left are sent by the bot while the blue messages on the right are sent by the user.
You can also click the top left date picker to filter date/time within a specific range.
If you want to save the conversation as a copy in your local computer, you may click the "Export" button at top right. You will be able to save the conversation history in .CSV.
Filtering
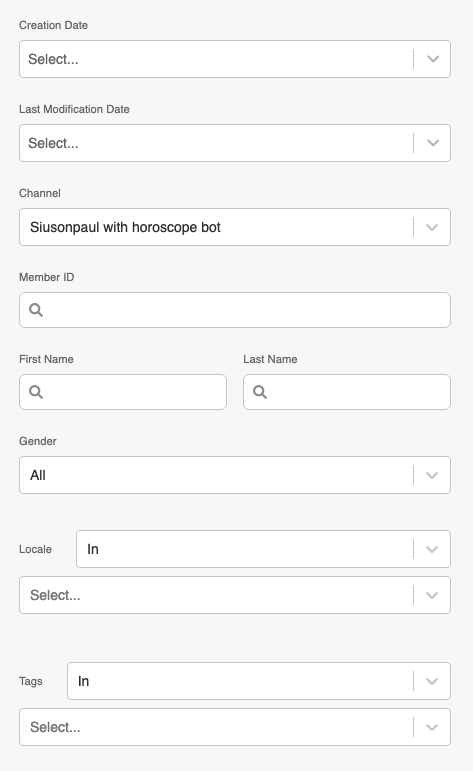
On your left, there is a section for your to filter out specific groups of members by Creation Date, Last Active Date, Channel, External ID, Name, Gender, Locale or Tags.
The most common one will be filtering by channels. Just select your filter option and you will see the member details automatically refreshed on your right.

TIP
By sharing your member page URL, other users can also view the same page with filters applied (if any).
Custom Filter
Apart from the basic filter, you can also scroll to the bottom and use the custom filter.
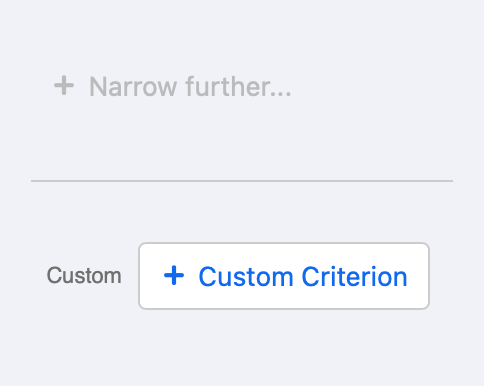
By using MongoDB Compass, you can enter your customized criteria, then search and sort any type of object in the member profile. You can also apply the basic filter and the custom filter simultaneously. For example, the custom filter allows you to filter by the information stored in Meta or tempData.
To learn how to apply tempData, you can refer to the advanced standard procedure.
Click here to view all the objects stored under the Member object.
Example 1:
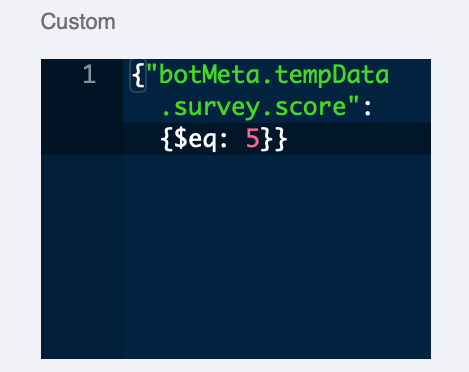
If you have customer satisfaction question, and the score is saved in tempData, you can use filter the members who gave the same score.
Given the score is saved in tempData in this format:
You can search all the members who gave 5 points:
Click here to learn how to how query on embedded documents with MongoDB Compass.
Example 2:
If you want to filter the members who talked to your live chat support, and gave a score of 3 or above, you can also apply two criteria.
Given the information is saved in tempData in this format:
You can search for the members who match with both criteria.
Click here to learn the Query and Projection Operators in MongoDB.
Import & Export
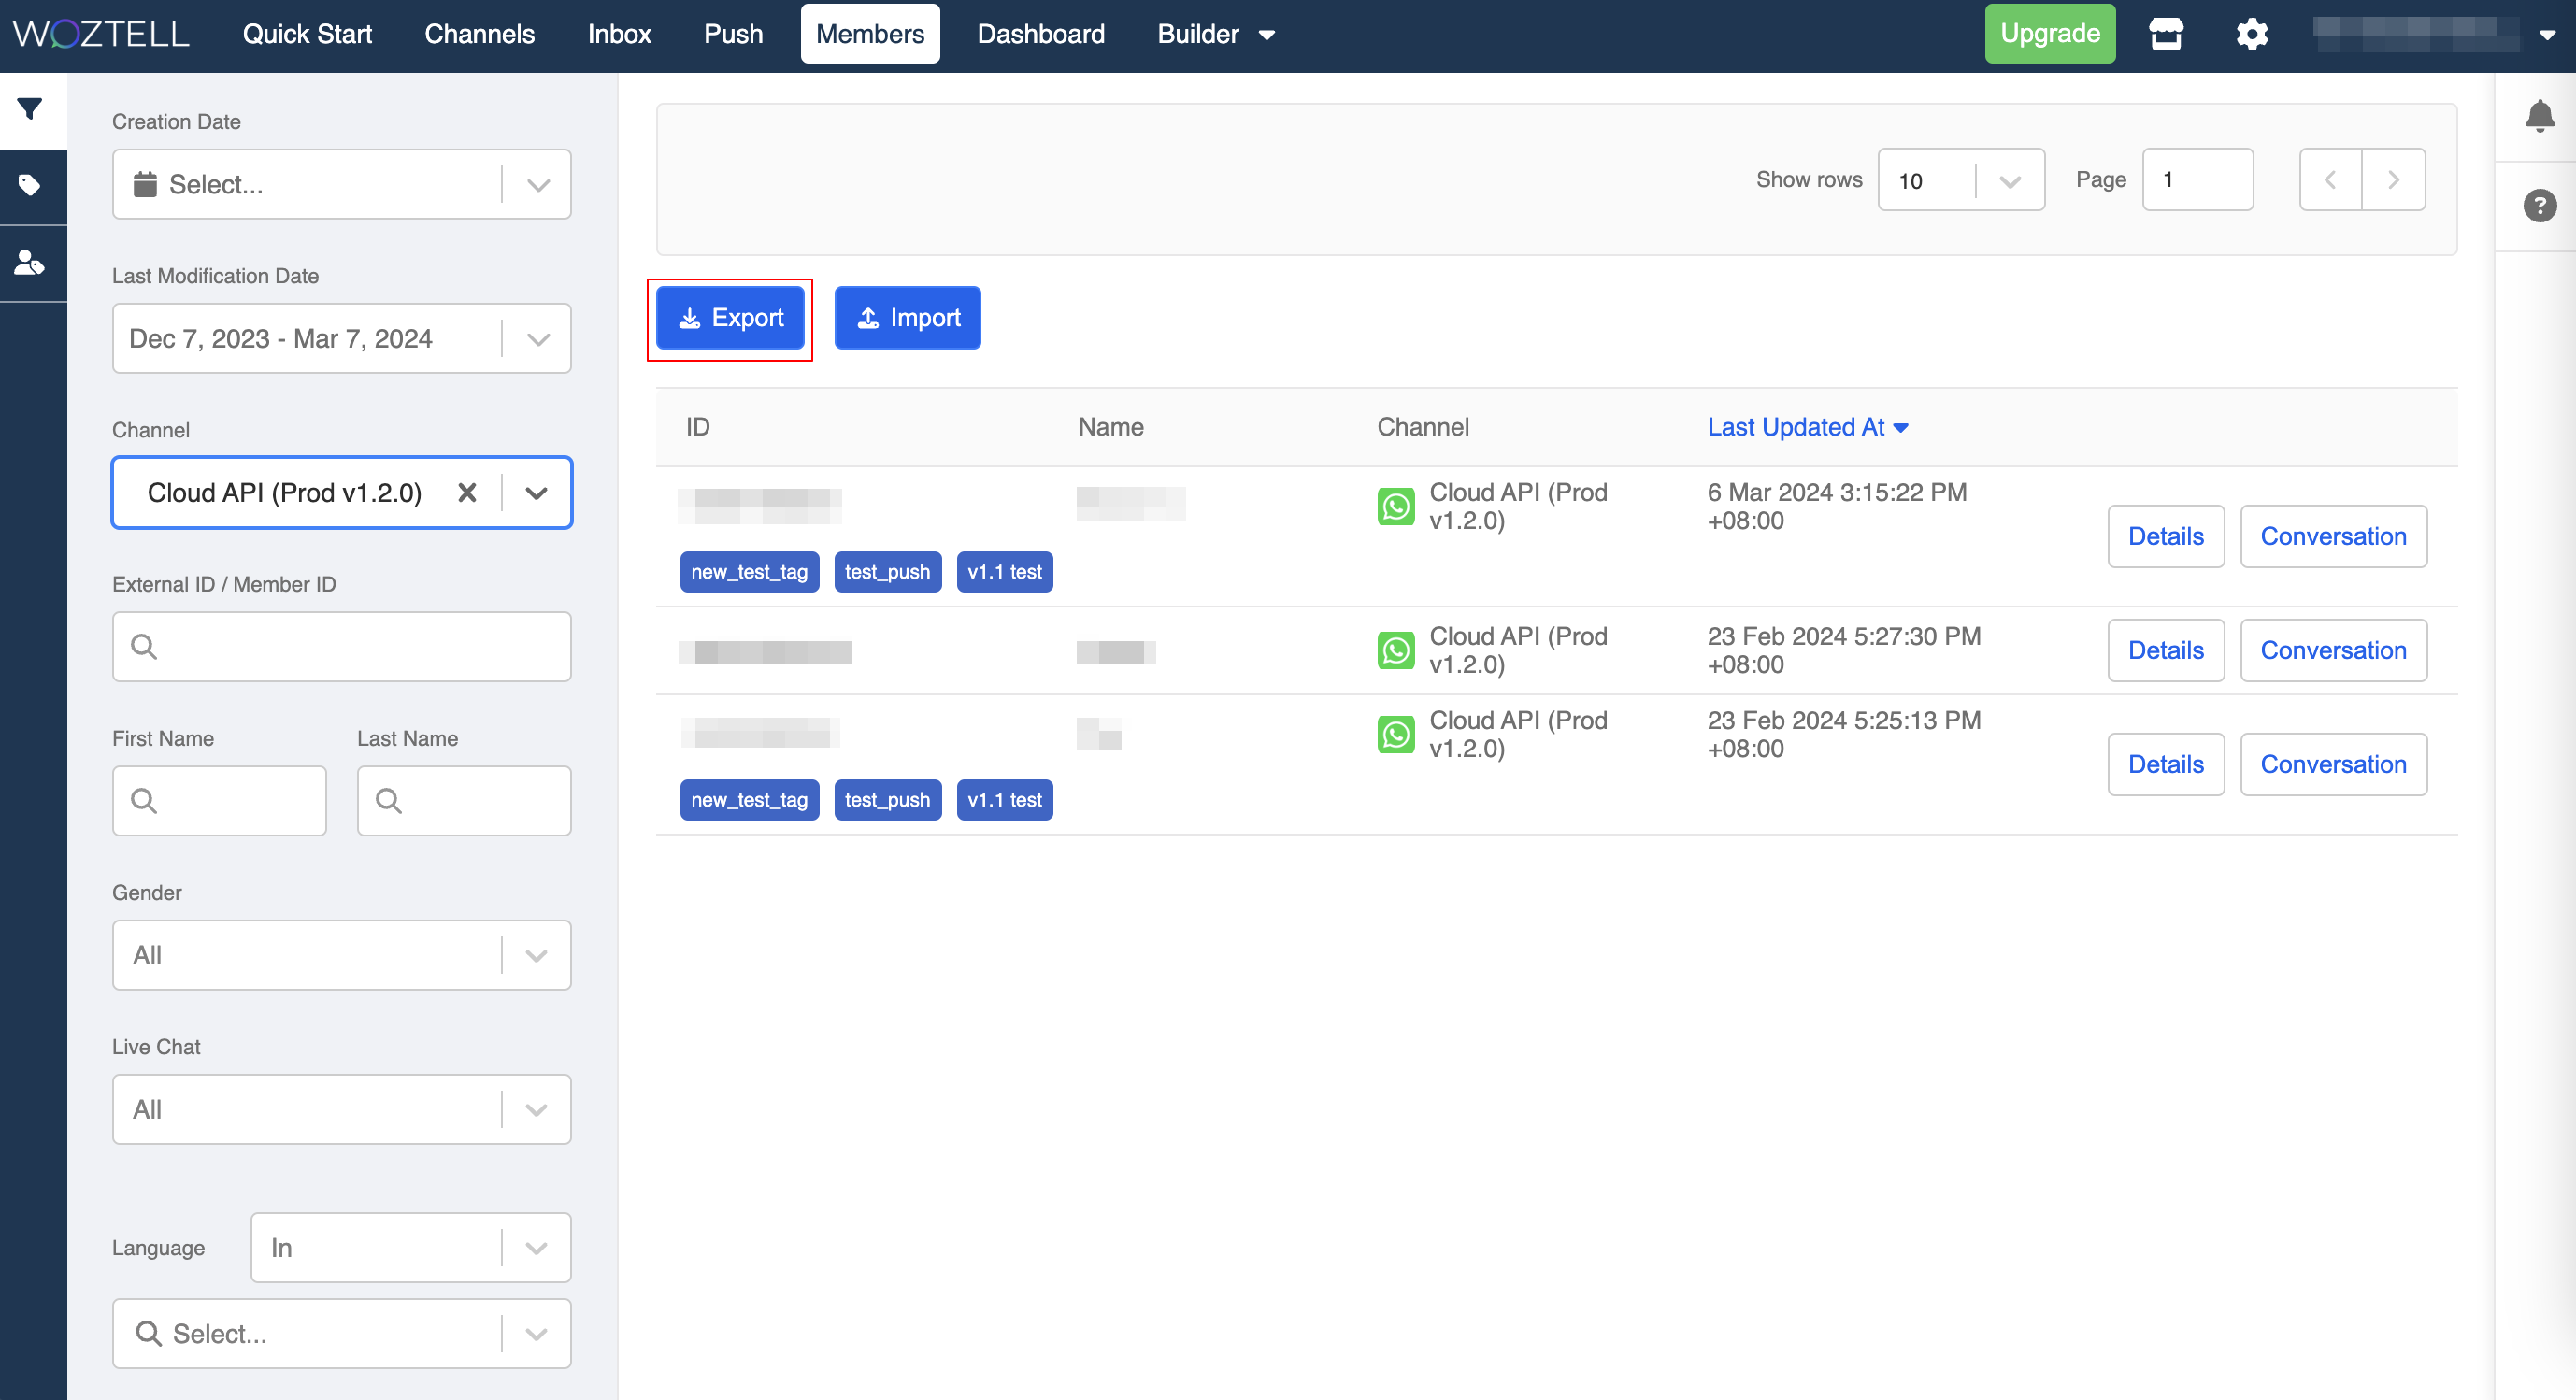
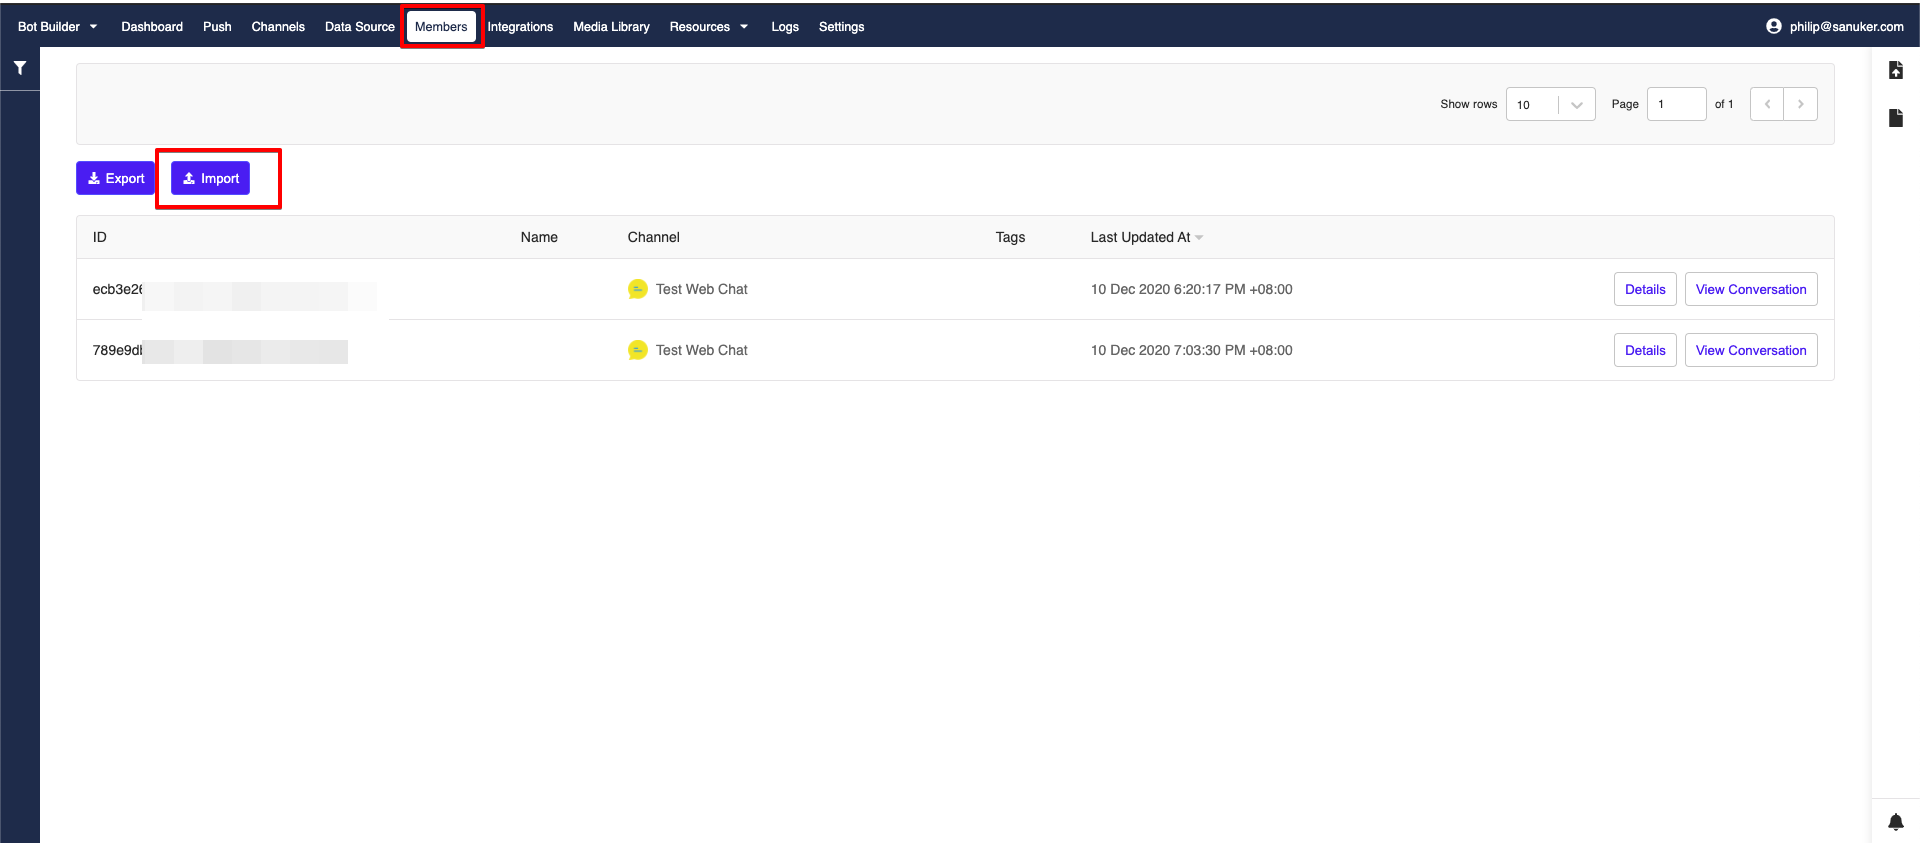
Export Member List
- You can easily export the list of existing members by clicking the "Export" button on top of the member list.
- The export will be processed, and a fil will be available for downloading in the "Notifications" section.1.
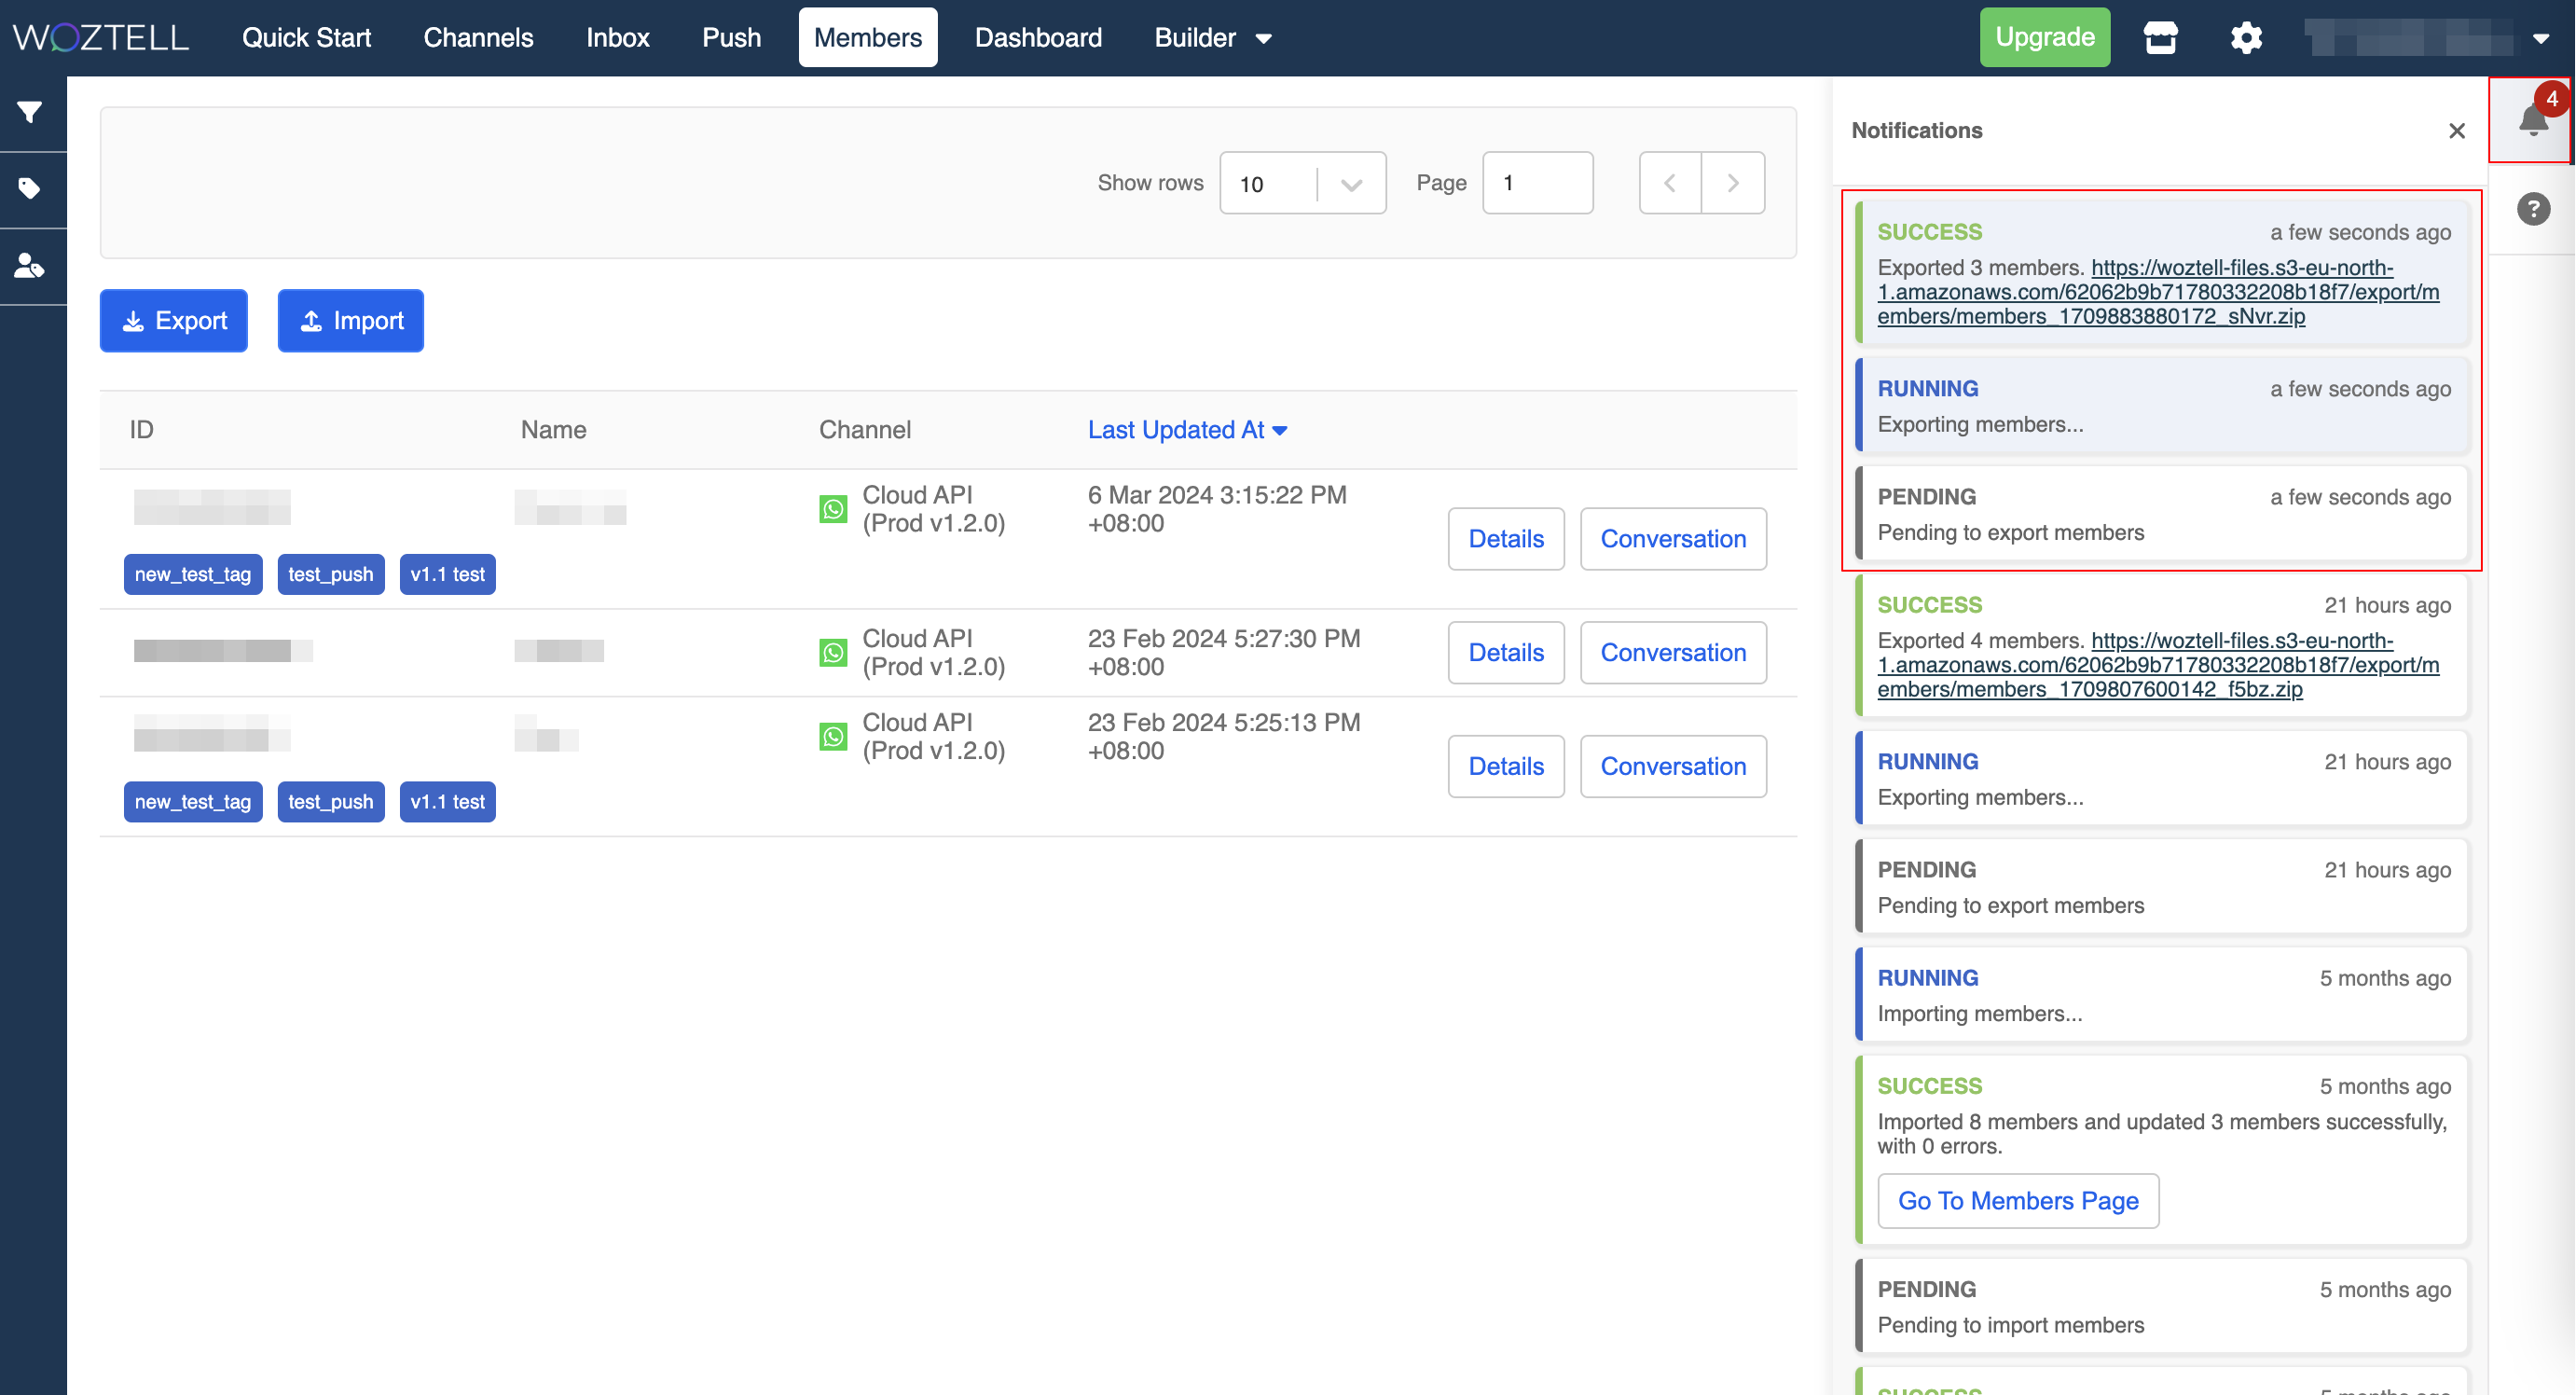
- The exported file will be in
.csvwith details of the filtered members.

Import Member List
If you already have an existing member list from another source, you can import these members (in .csv format) to WOZTELL. You just need to make sure the following information is correct:
| Label | Description | Required |
|---|---|---|
| externalID | The external ID of the member; It is in a specific format for specific platforms (i.e. Facebook is PSID & WhatsApp is the phone number) | Y |
| tag | The existing tags of the member; It must be text and separated with "," if there are multiple tags | N |
| firstName | The first name of the member | N |
| lastName | The last name of the member | N |
| gender | The gender of the member | N |
| Profile Image URL | URL of the profile image | N |
| locale | The locale of the member | N |
| DOB Year | Year of the date of birth | N |
| DOB Month | Month of the date of birth | N |
| DOB Day | Day of the date of birth | N |
| Phone | Phone number of the member (Not needed for WhatsApp member) | N |
| Email address of the member | N | |
| Address Line 1 | Line 1 of the member's address | N |
| Address Line 2 | Line 2 of the member's address | N |
| Address City | City of the member's address | N |
| Address State | State of the member's address | N |
| Address Country | Country of the member's address | N |
| Address Zip | Zip of the member's address | N |
| Meta | Custom data to be saved to the member's meta | N |
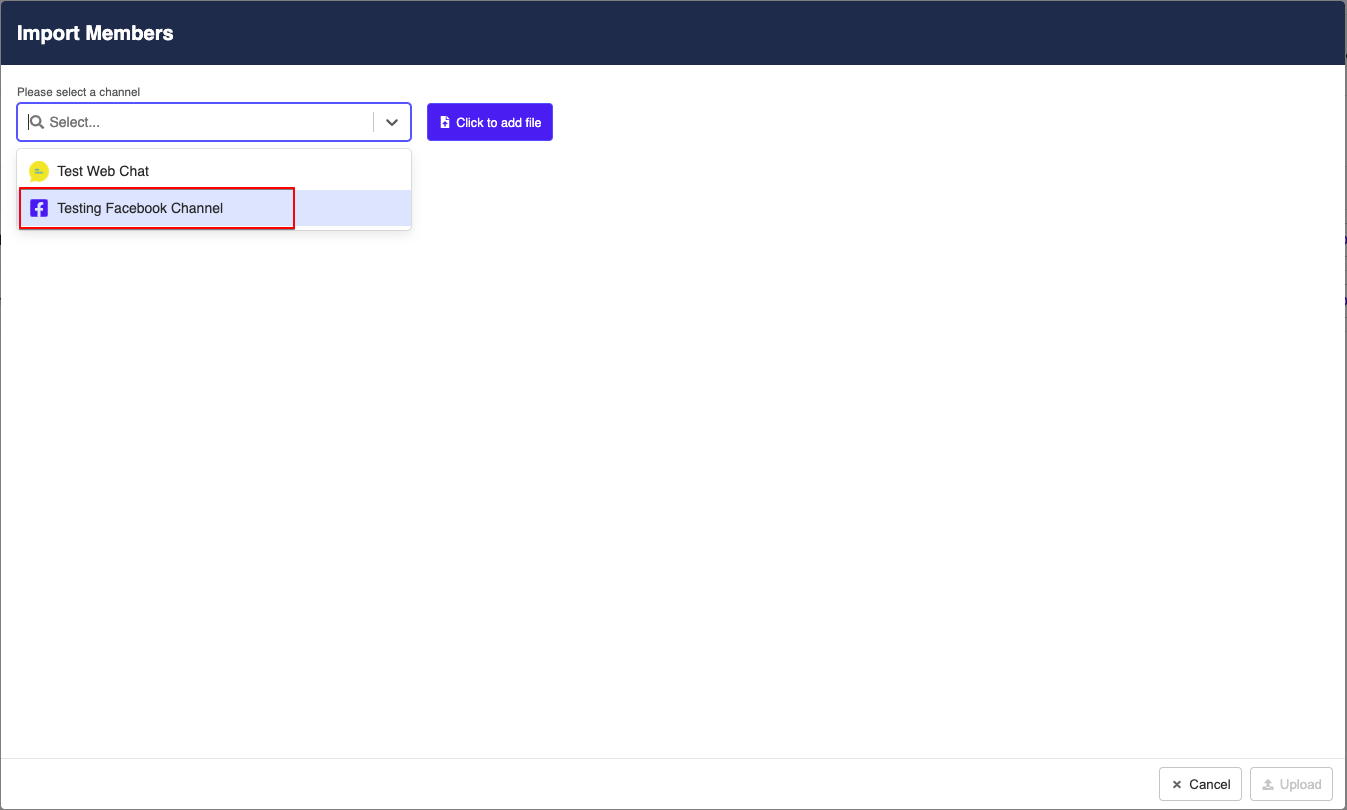
- Click "Import" on top of the member list.
- Choose the corresponding channel to be imported.
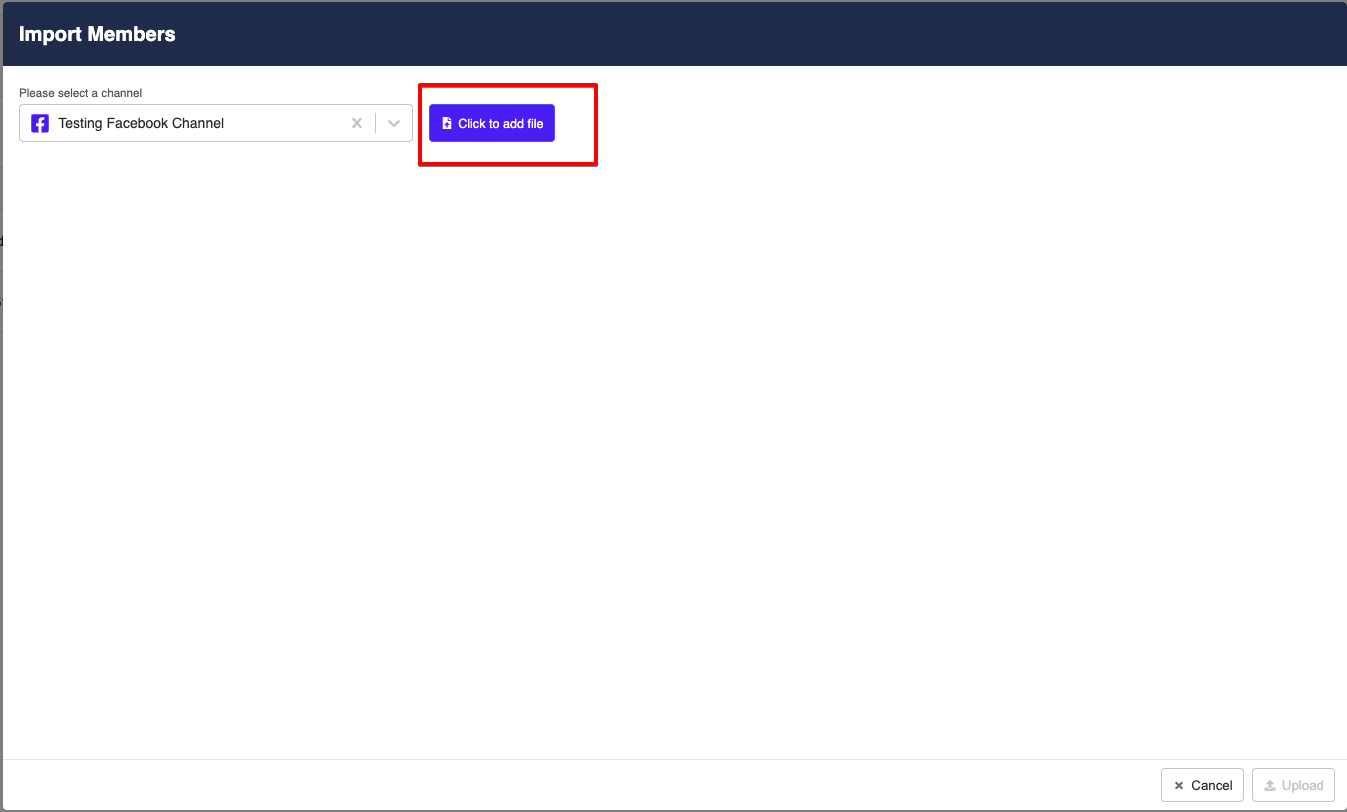
- Add the member list in
.csvfile. You can click "Download" to get a copy of a sample member list.
- Once the member list is added, click "Next" to proceed.

- "Your Fields" in the
.csvfile will be listed, and you need to match it with the corresponding "Woztell Fields" by selecting from the picker.
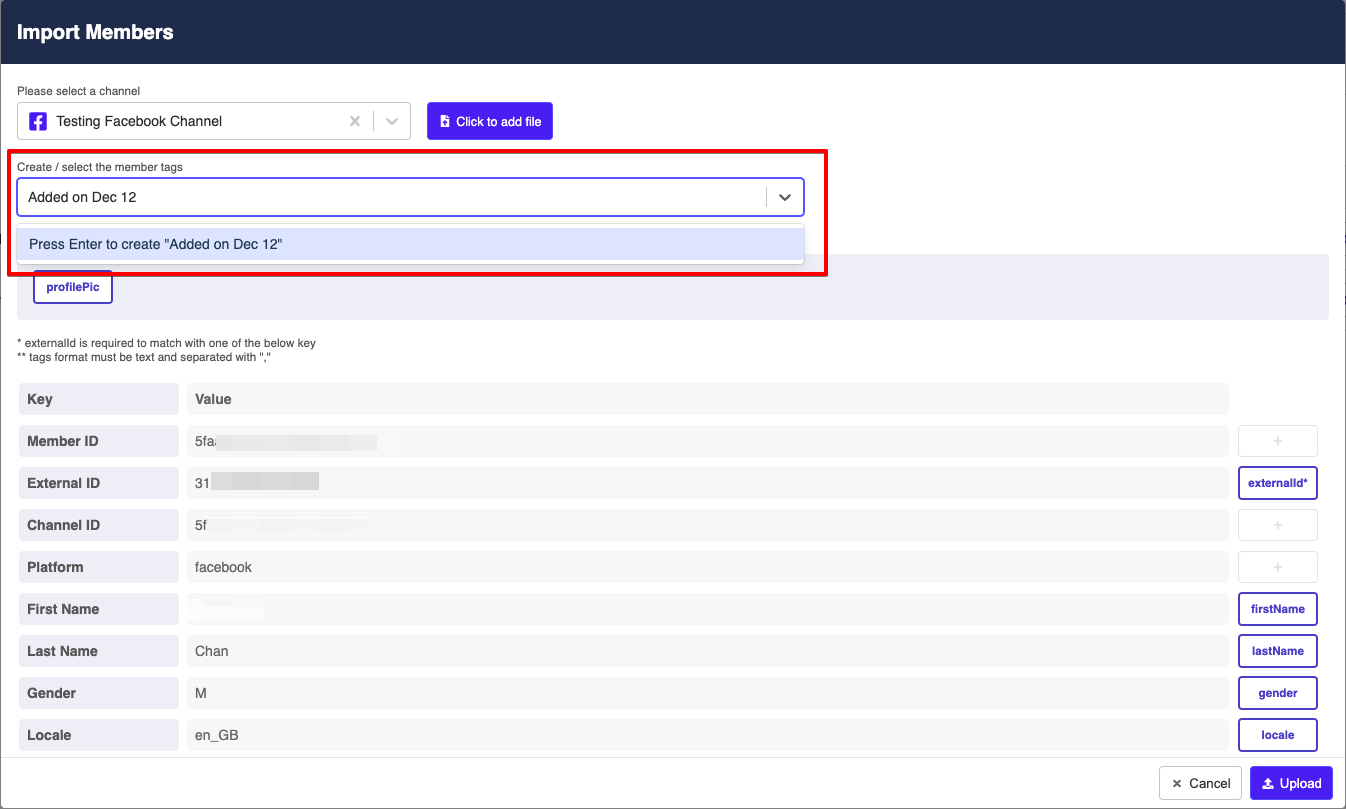
- Only the matched fields will be imported, and it is necessary to have the externalId in order to proceed with the importing.
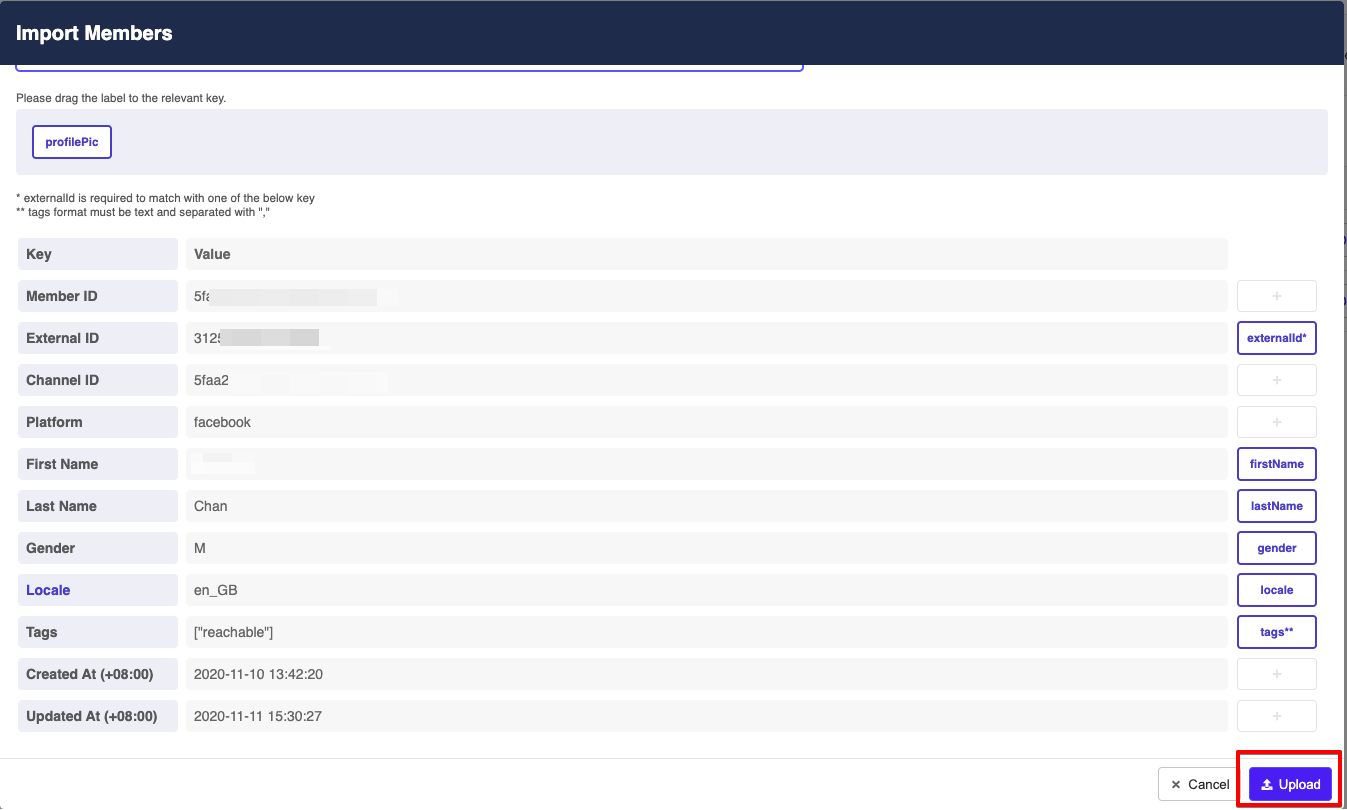
- For some fields including "Phone", "Email" and "Address", you are required to assign an alias, as our system allows saving more than one set of these information.
- You can also save custom data to the member's meta. You will need to assign the path, for example
meta.crm. Also, you need select one of the supported data type.
| Type | Description | Example |
|---|---|---|
| Text | String | sample_text |
| Number | String; numbers only | 91231 |
| Object | JSON object | {"age":34, "status":"registered", "membership":"VIP"} |
| Array | JSON array | ["item1", "item2", "item3"] |
| Boolean | JSON boolean value | true / false |

- Once you have matched the fields, click "Next" to proceed.
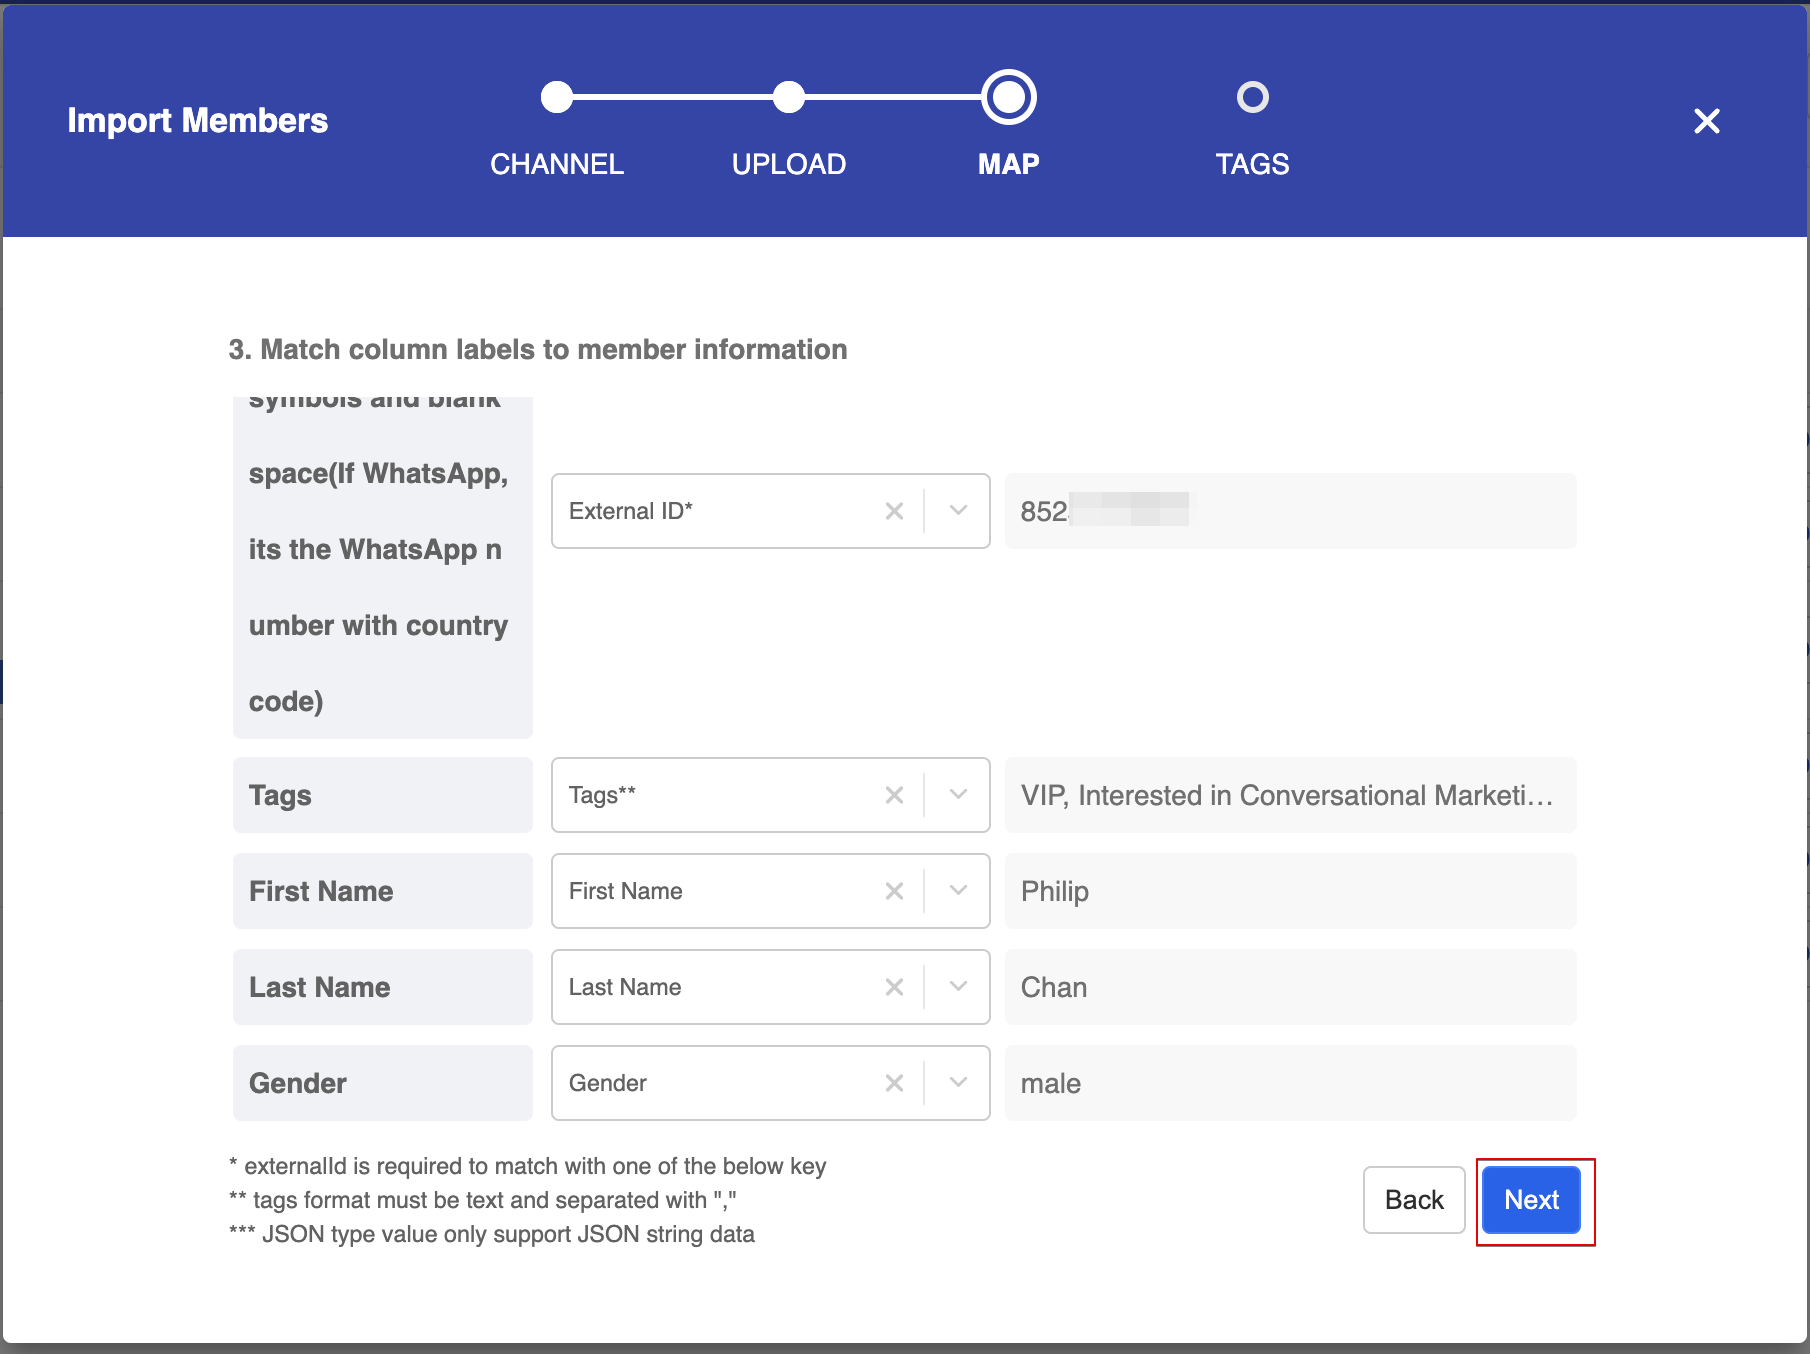
- Once you have matched the fields, click "Next" to proceed.
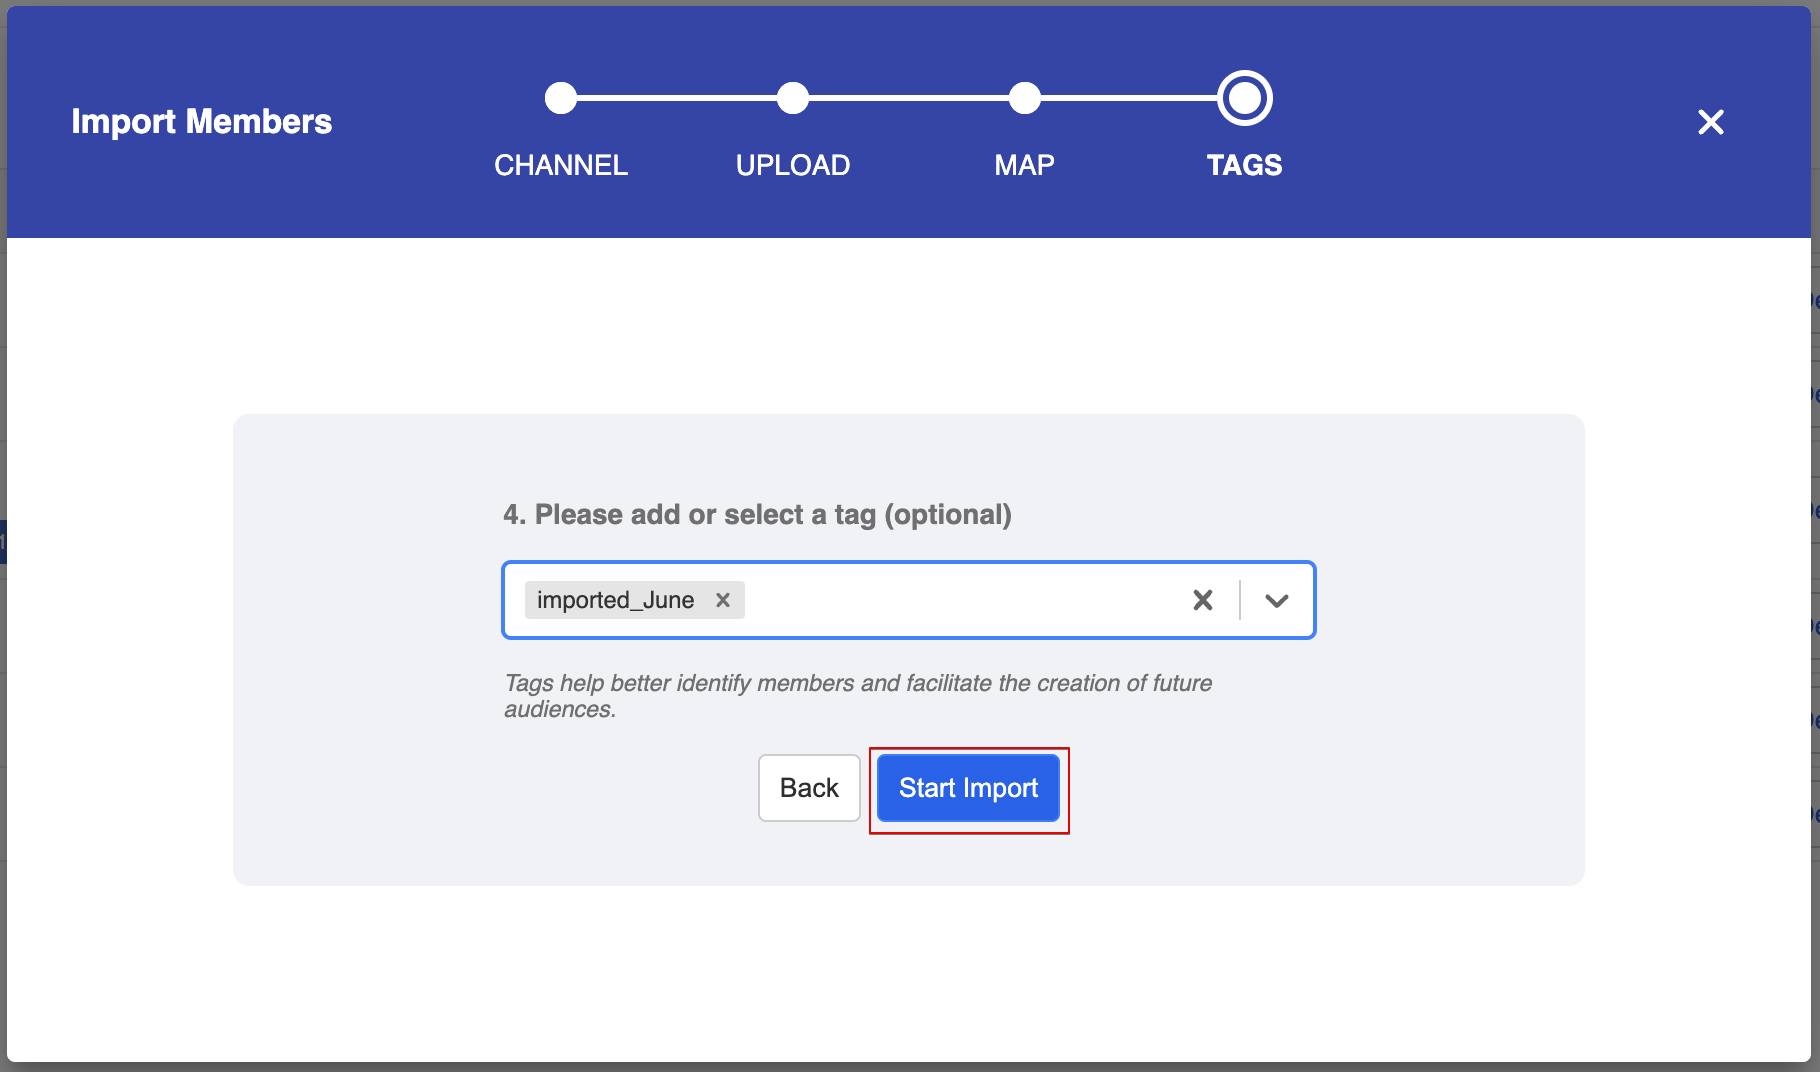
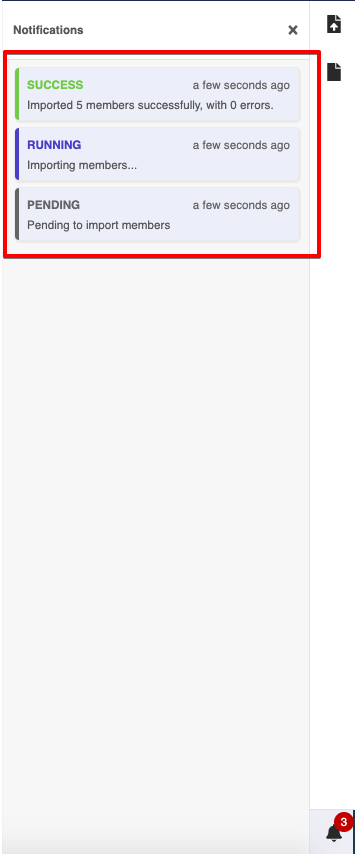
- The member will start being imported soon.
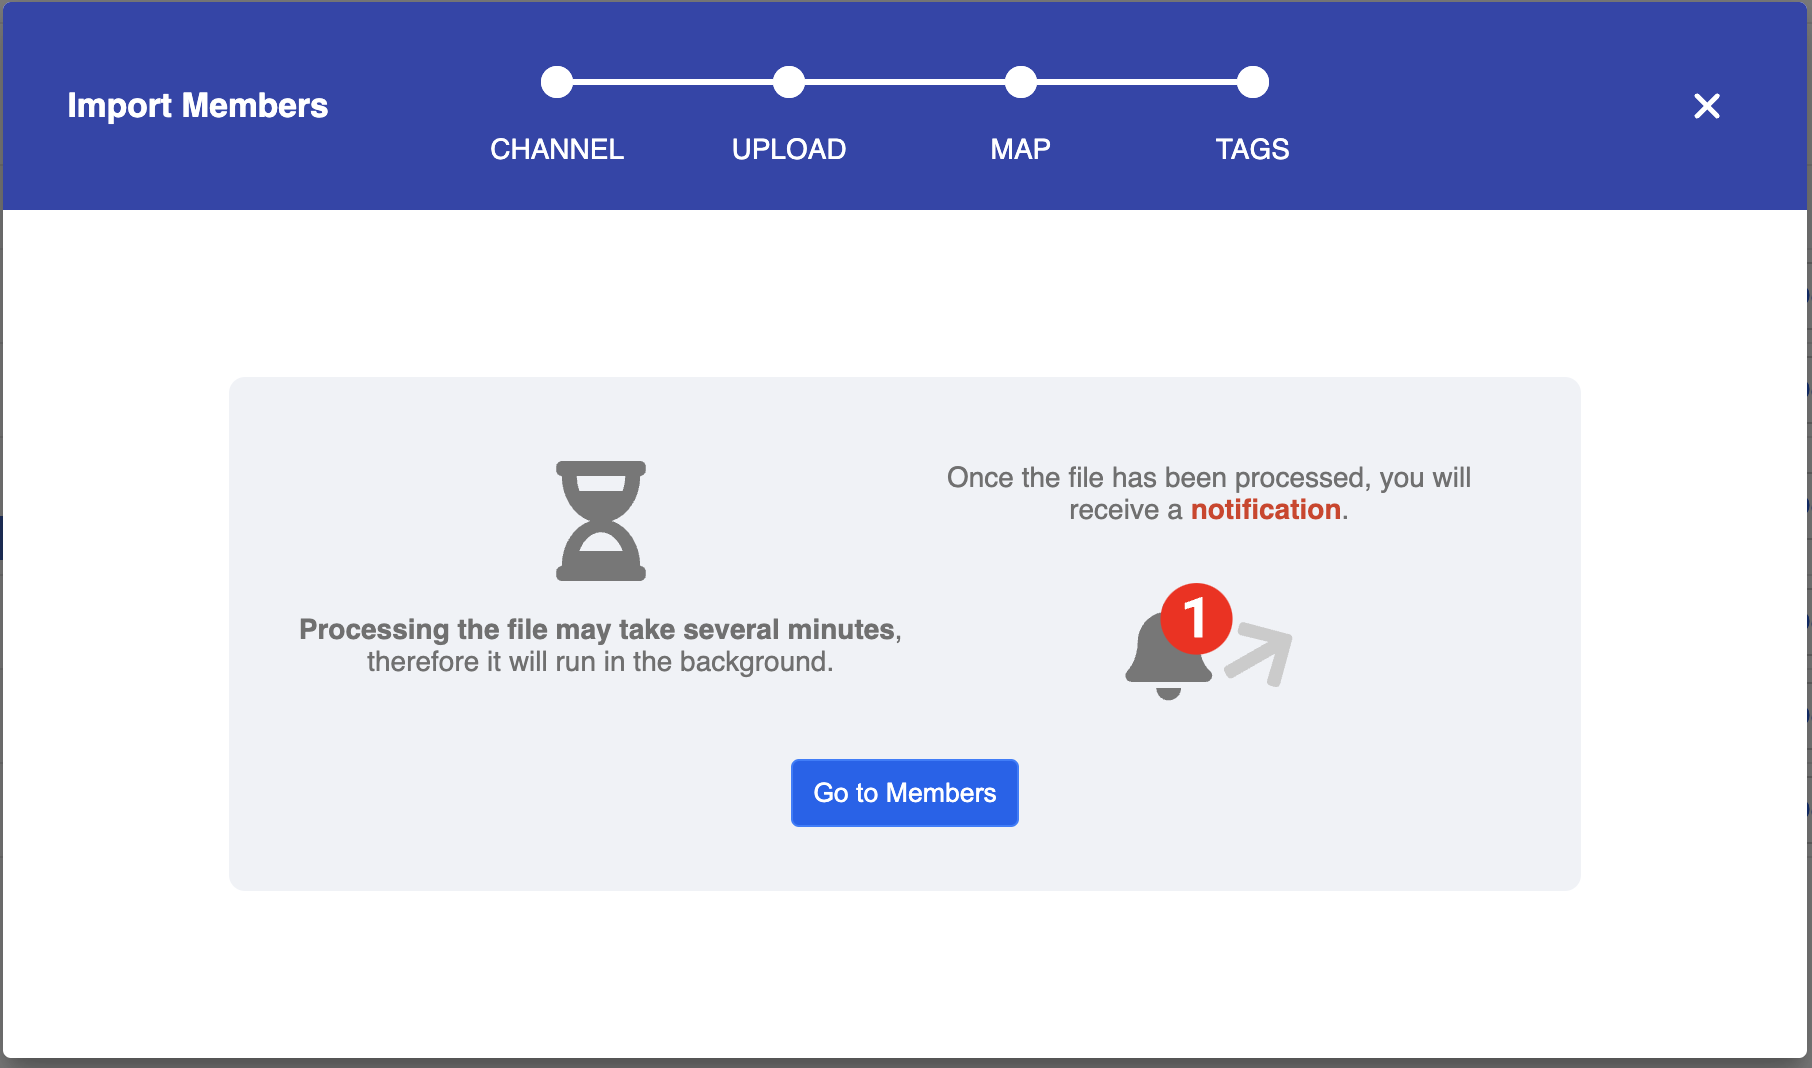
- The progress of the import member can be viewed in the "Notifications sidebar. There will be a report available for
- downloading if there is any error occurs.
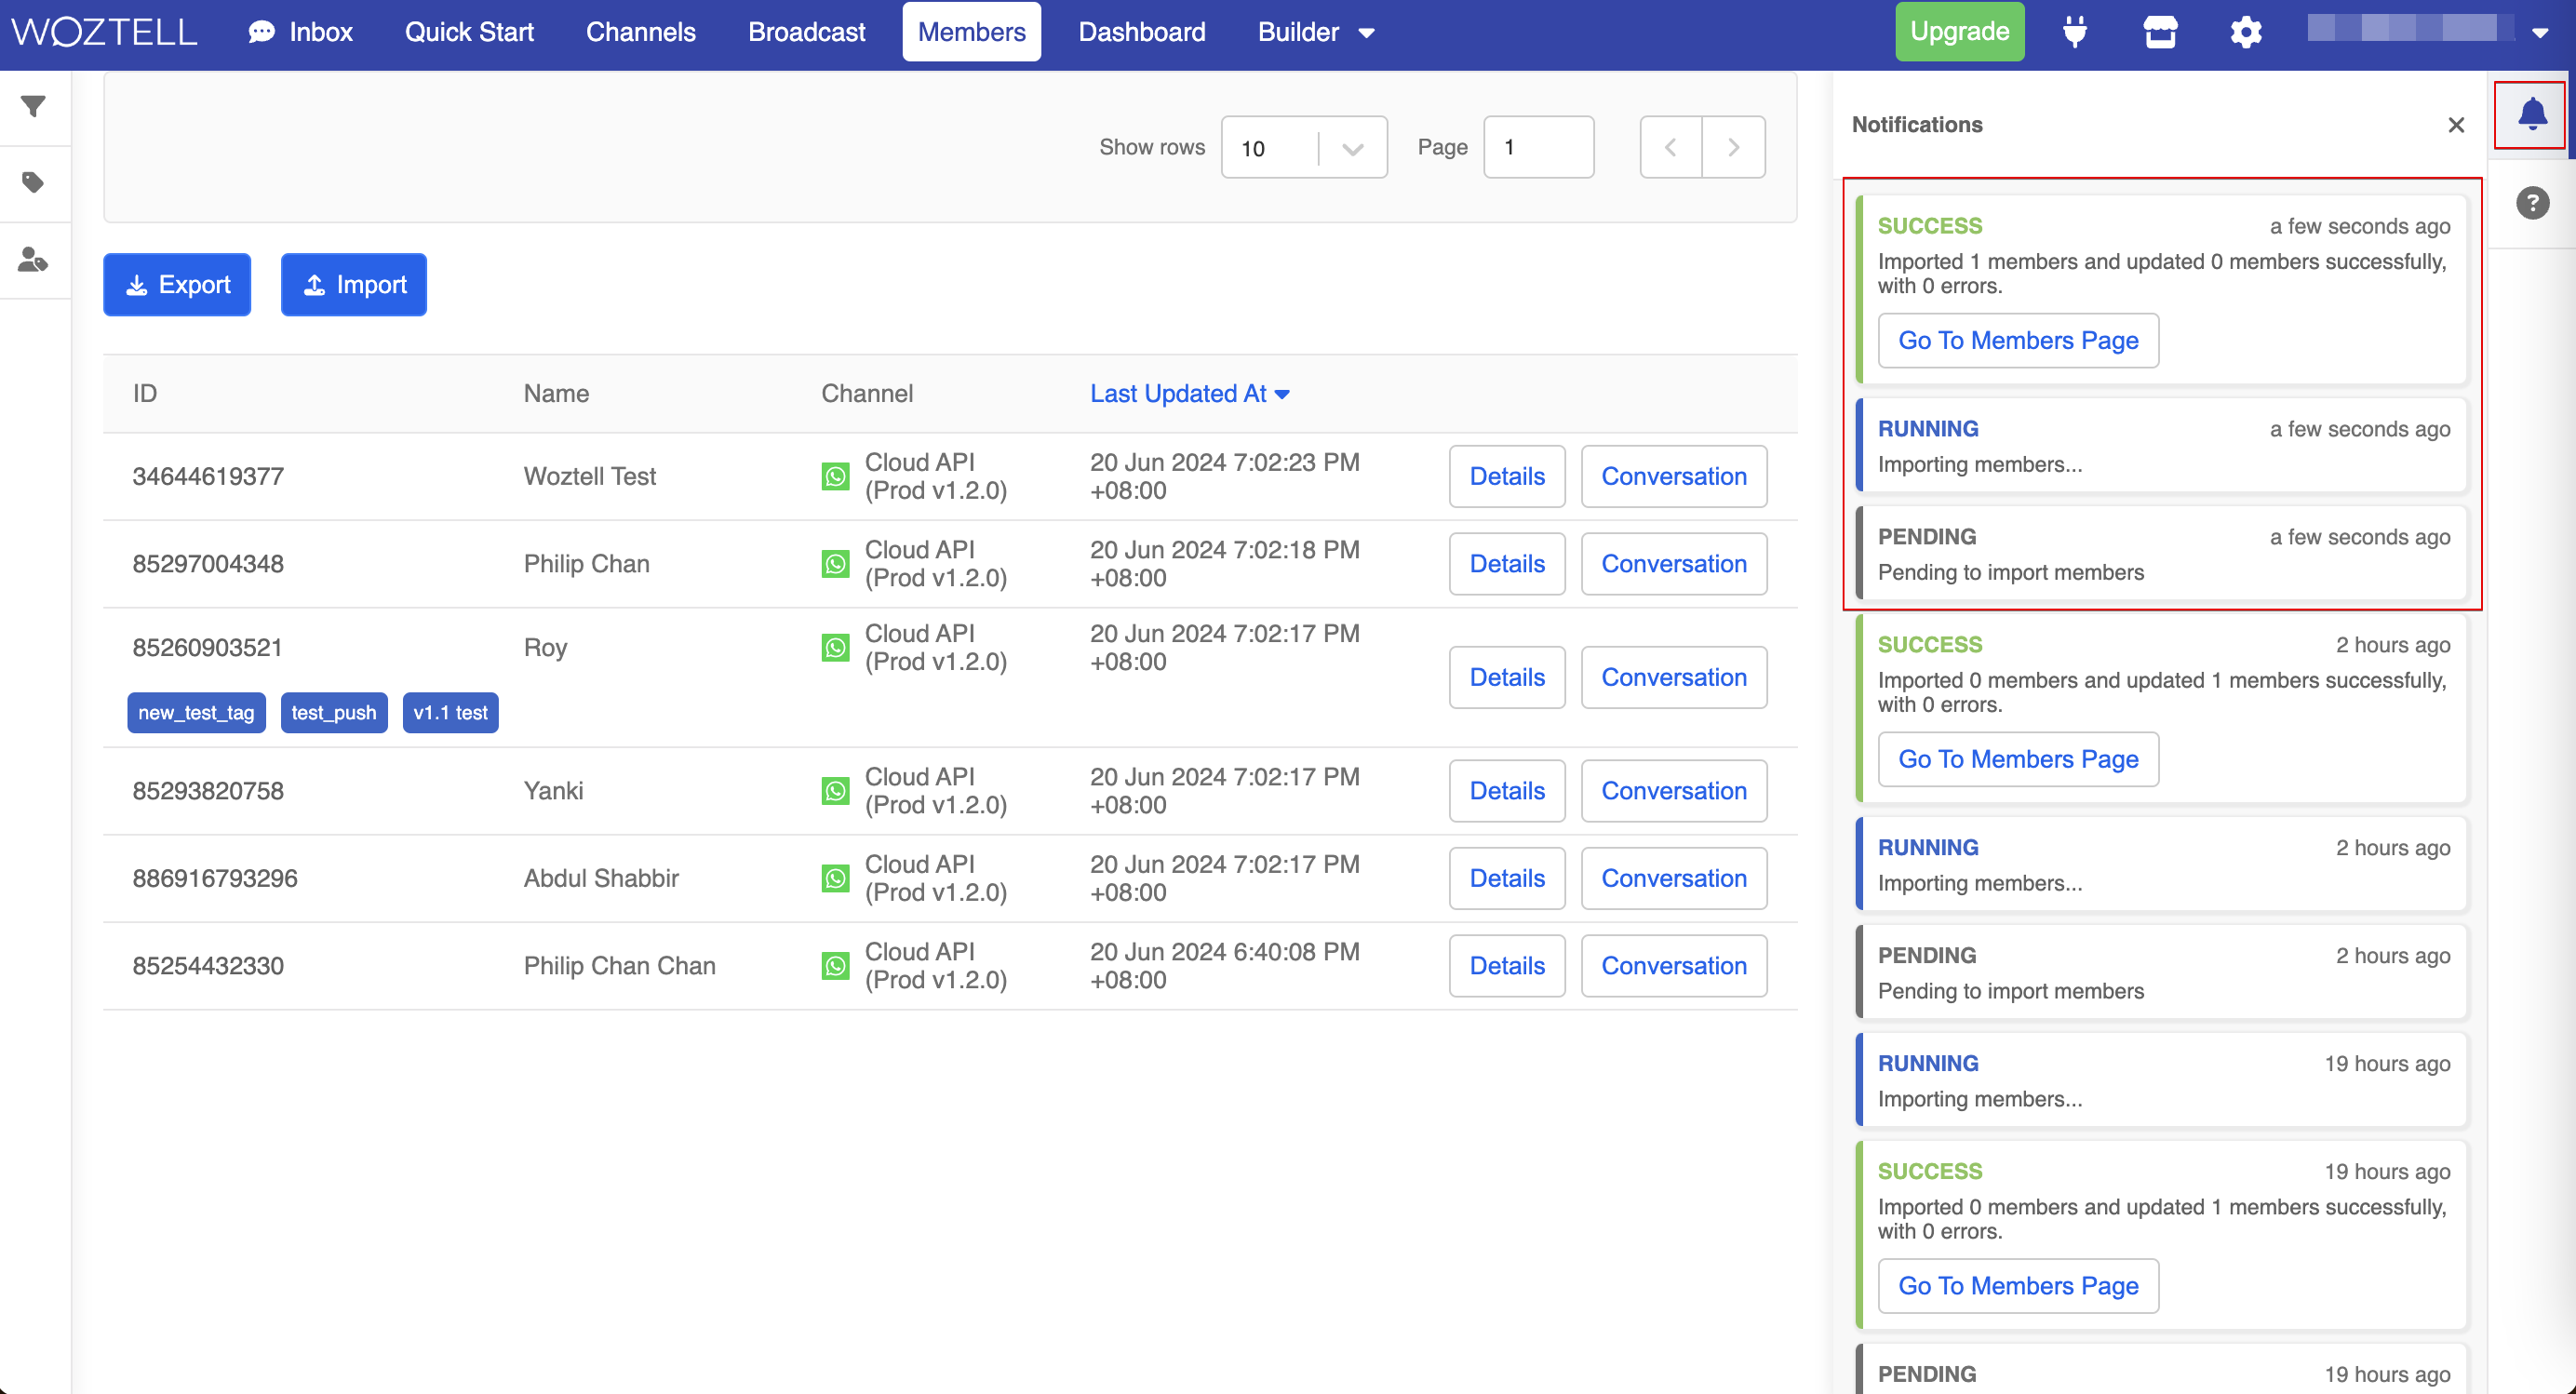
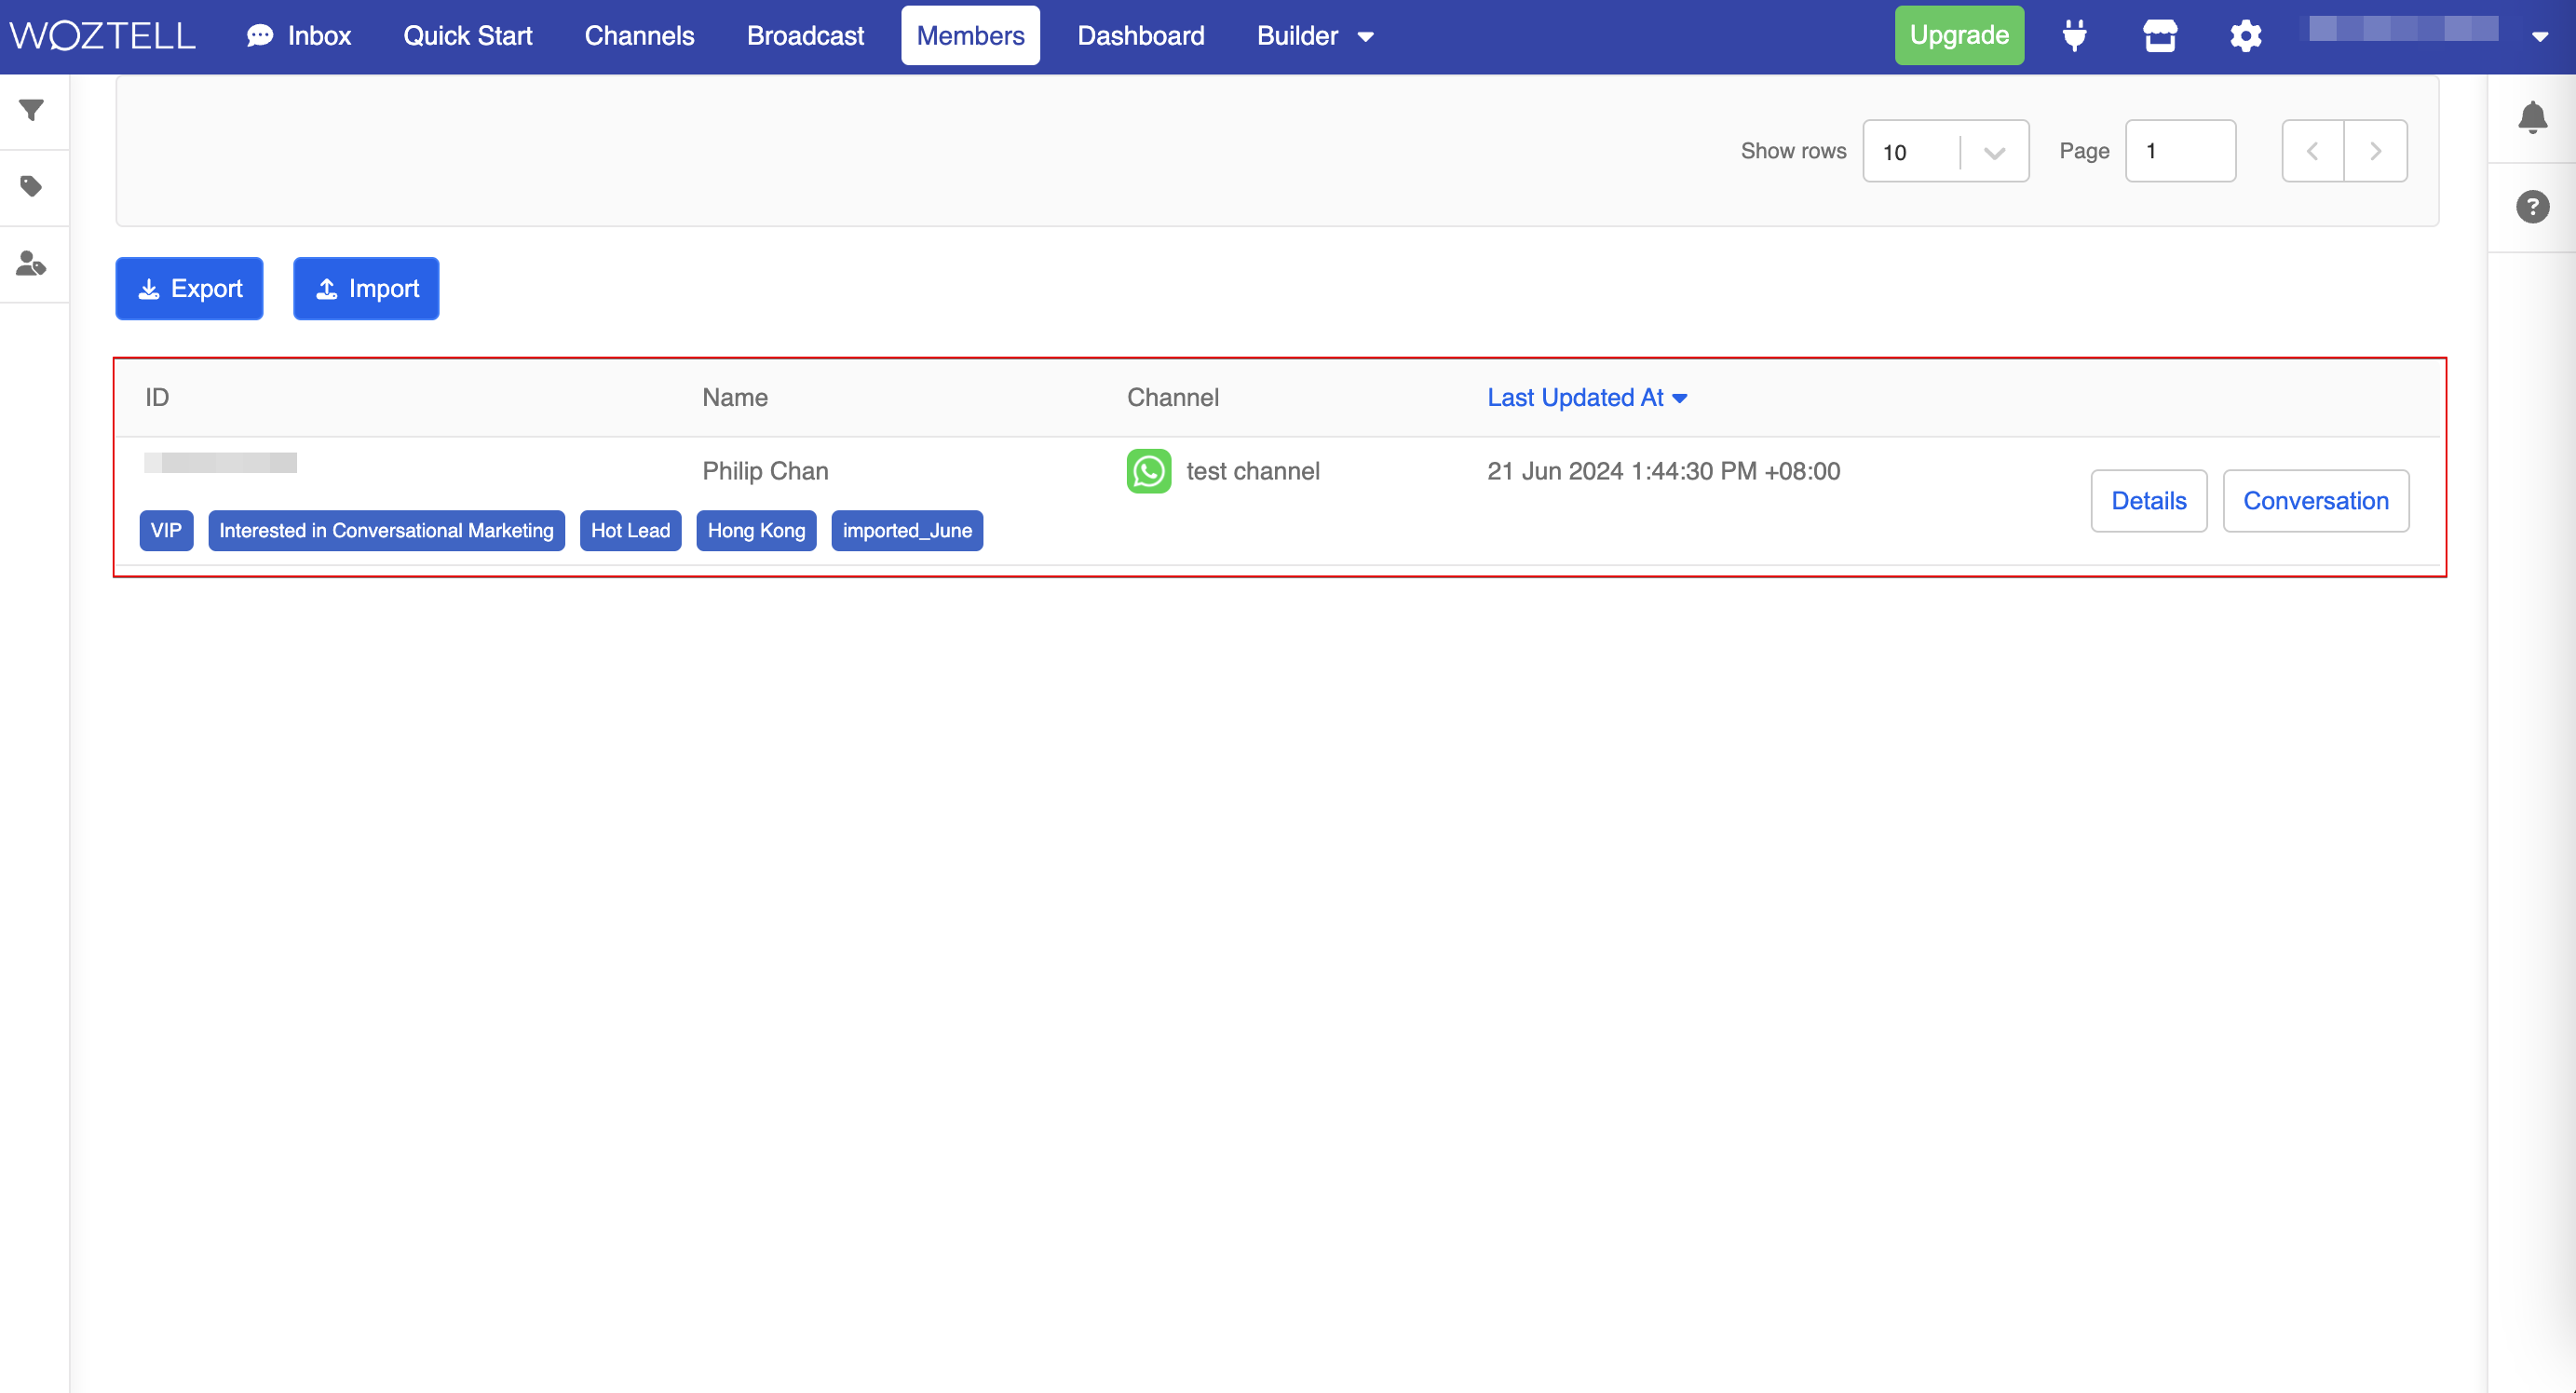
- Now the member has been imported.
Create Single Member
Apart from importing a group of member, you can also create a single member by manually filling in the member information.
- Click "+ Single Member" to create a single member.

- In the "Create Member" modal, first, fill in the mandatory information: Channel and External ID.

- Then, fill in other optional fields. It is always recommended to add the First Name and Last Name as well.

- Some fields such as Emails and Addresses, allow user to save more than one set of the data. For these, user is required to add an customizable alias for each set.

- Click "+ Create Member" to complete the member creation.

- Now, the new member has been created.
